Add DNS records · Cloudflare
When you add a sending domain to Bird, the domain's detail page in the Bird dashboard lists every DNS record to publish, each with a copyable host and value. Keep that page open in one tab and the Cloudflare dashboard in another. Copy each value from Bird instead of typing it.
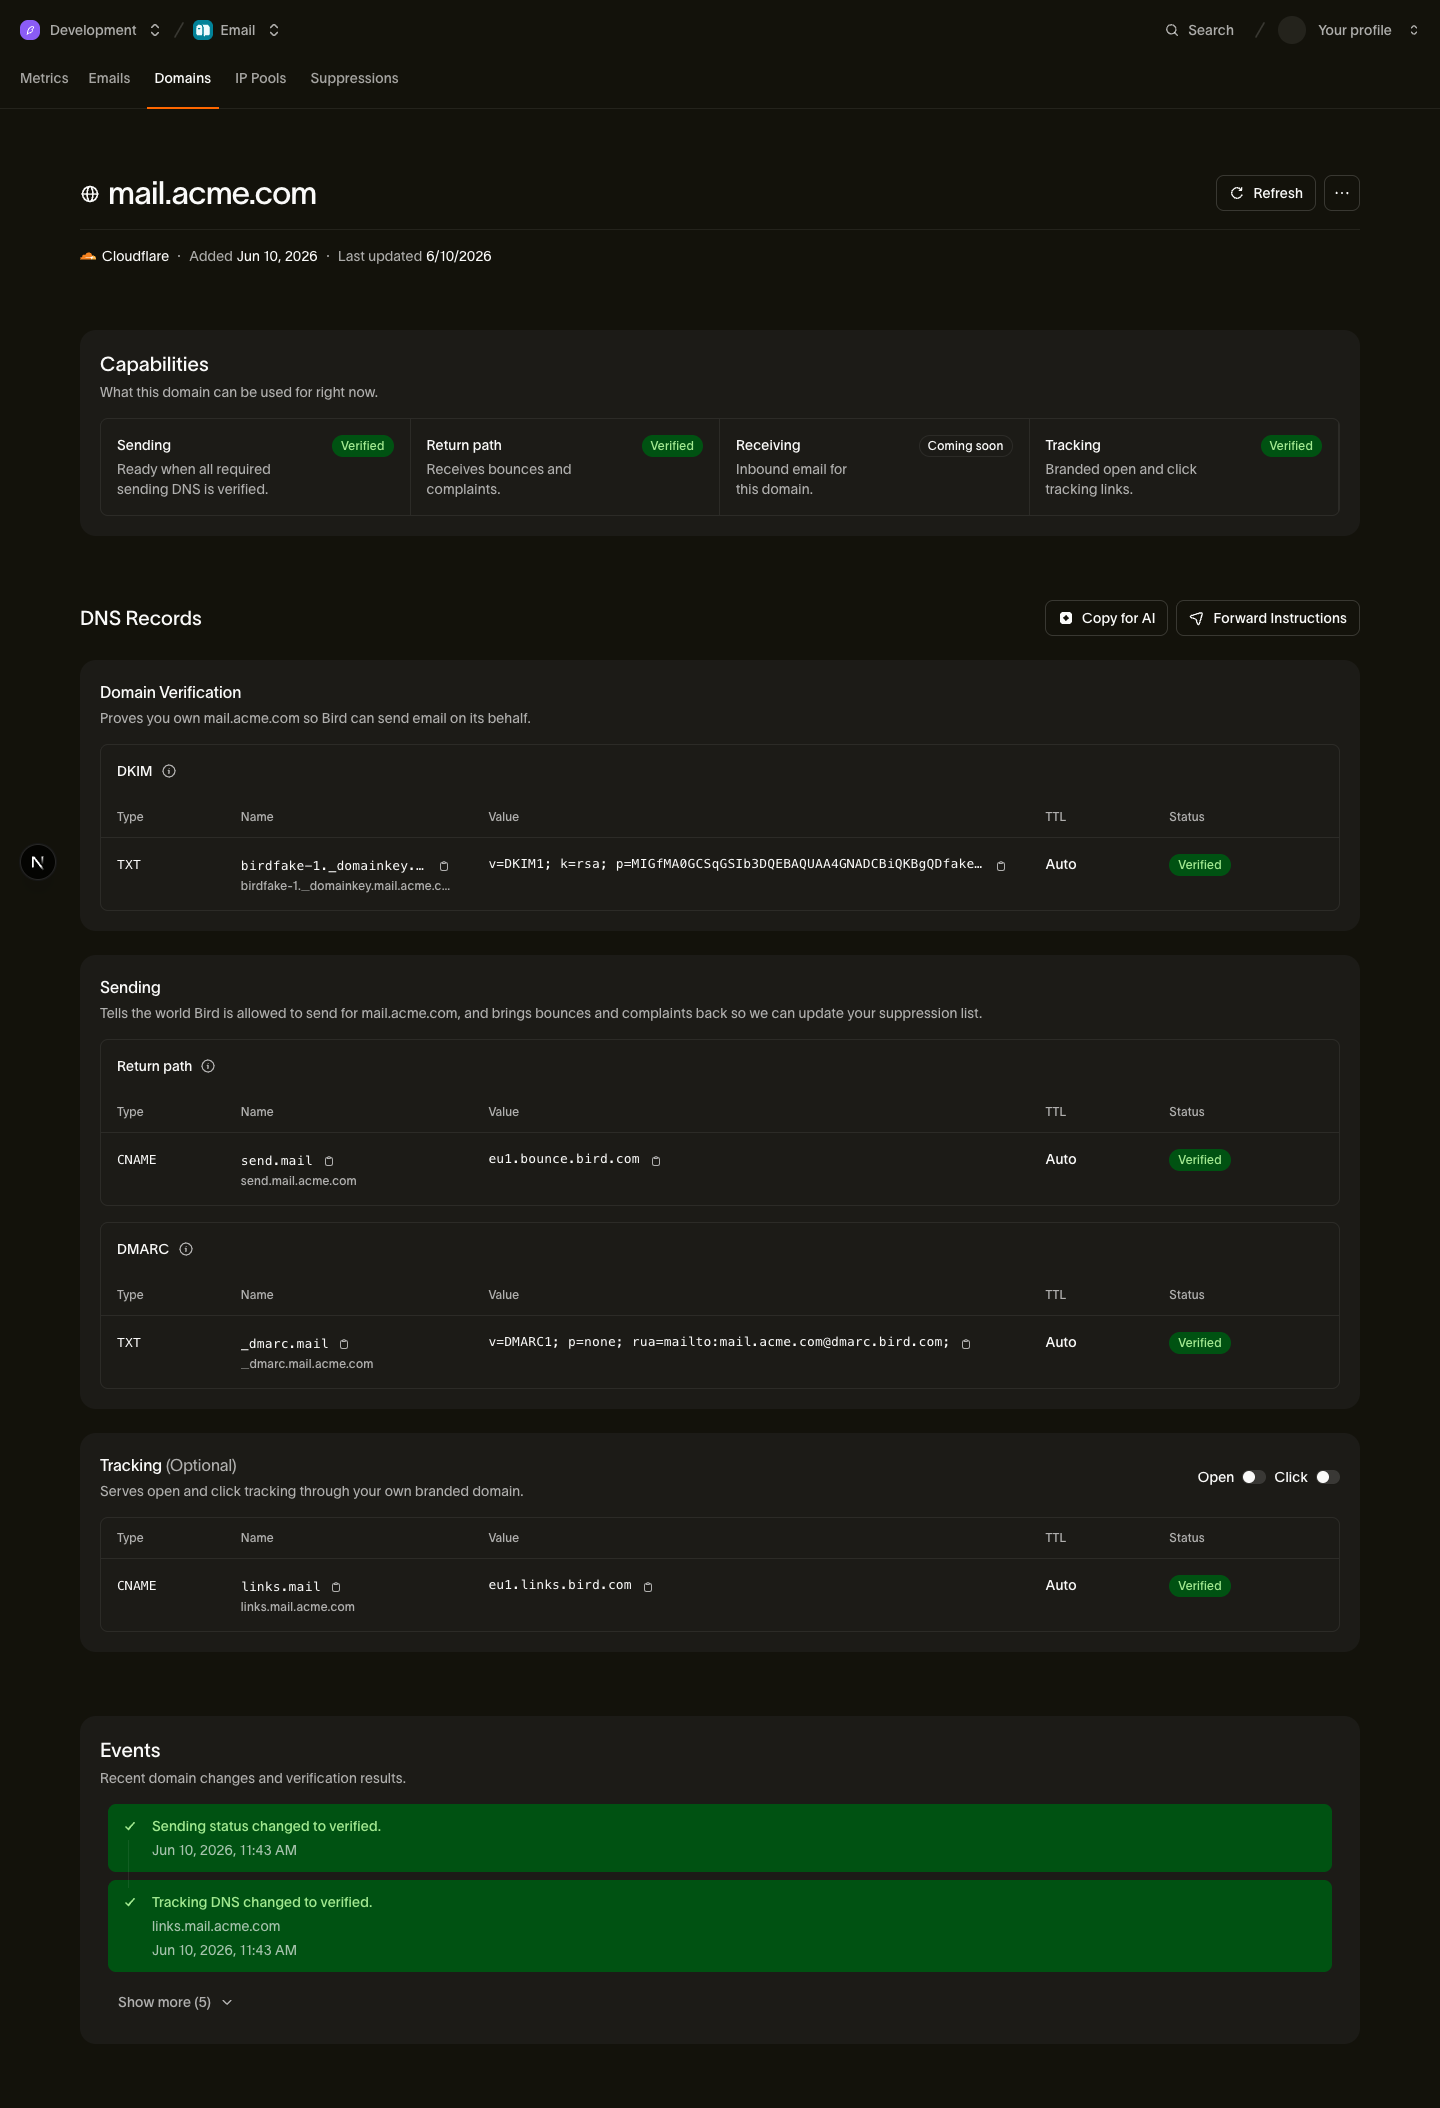
The records you'll add
| Type | Host | Value (copy from Bird) |
|---|---|---|
| TXT | <selector>._domainkey.example.com | Your DKIM key |
| CNAME | send.example.com | <region>.bounce.bird.com |
| TXT | _dmarc.example.com | Your DMARC policy |
| CNAME | links.example.com (optional) | <region>.links.bird.com |
The tracking CNAME (links) is optional and enables branded open and click tracking. It is not required for sending.
Add the records in Cloudflare
- Log in to the Cloudflare dashboard and select the account that holds your domain.
- Select the domain, then select DNS > Records.
- Click Add record.
- For the DKIM record: set Type to TXT, paste the host from Bird into Name, and paste the DKIM value into Content. If the value is too long for Cloudflare to accept as one string, run it through the DNS record splitter first. Leave TTL on Auto. Click Save.
- Click Add record again. For the return-path record: set Type to CNAME, enter the host (for example
send), paste the target from Bird (for example<region>.bounce.bird.com) into Target, and switch Proxy status to DNS only. Click Save. - Click Add record again. For the DMARC record: set Type to TXT, enter
_dmarcas the Name, and paste the DMARC value from Bird into Content. Click Save. - If you want branded tracking, add the optional tracking record the same way as step 5: Type CNAME, Name
links, Target<region>.links.bird.com, Proxy status DNS only. Click Save.
Cloudflare-specific gotchas
- Turn proxying off. Cloudflare proxies CNAME records by default. A proxied record answers with Cloudflare's IPs instead of Bird's hostnames, which breaks bounce routing and verification. Set both CNAME records to DNS only.
- Watch the Name field. Cloudflare accepts a bare label (
send) or a fully qualified name (send.example.com). After saving, confirm that the published record name matches Bird.
After you publish
Bird checks your DNS automatically. You can also open the domain details in Bird and select Refresh. If the domain remains pending, see Verification delays.
Next steps
Related resources
Continue with the documentation, guides and examples for this topic.