Add DNS records · Azure DNS
If your domain's DNS is hosted in an Azure DNS zone, use this page to publish the DKIM, return-path, tracking, and DMARC records Bird provides. Bird does not require an SPF record at the domain apex; see DKIM, SPF & DMARC.
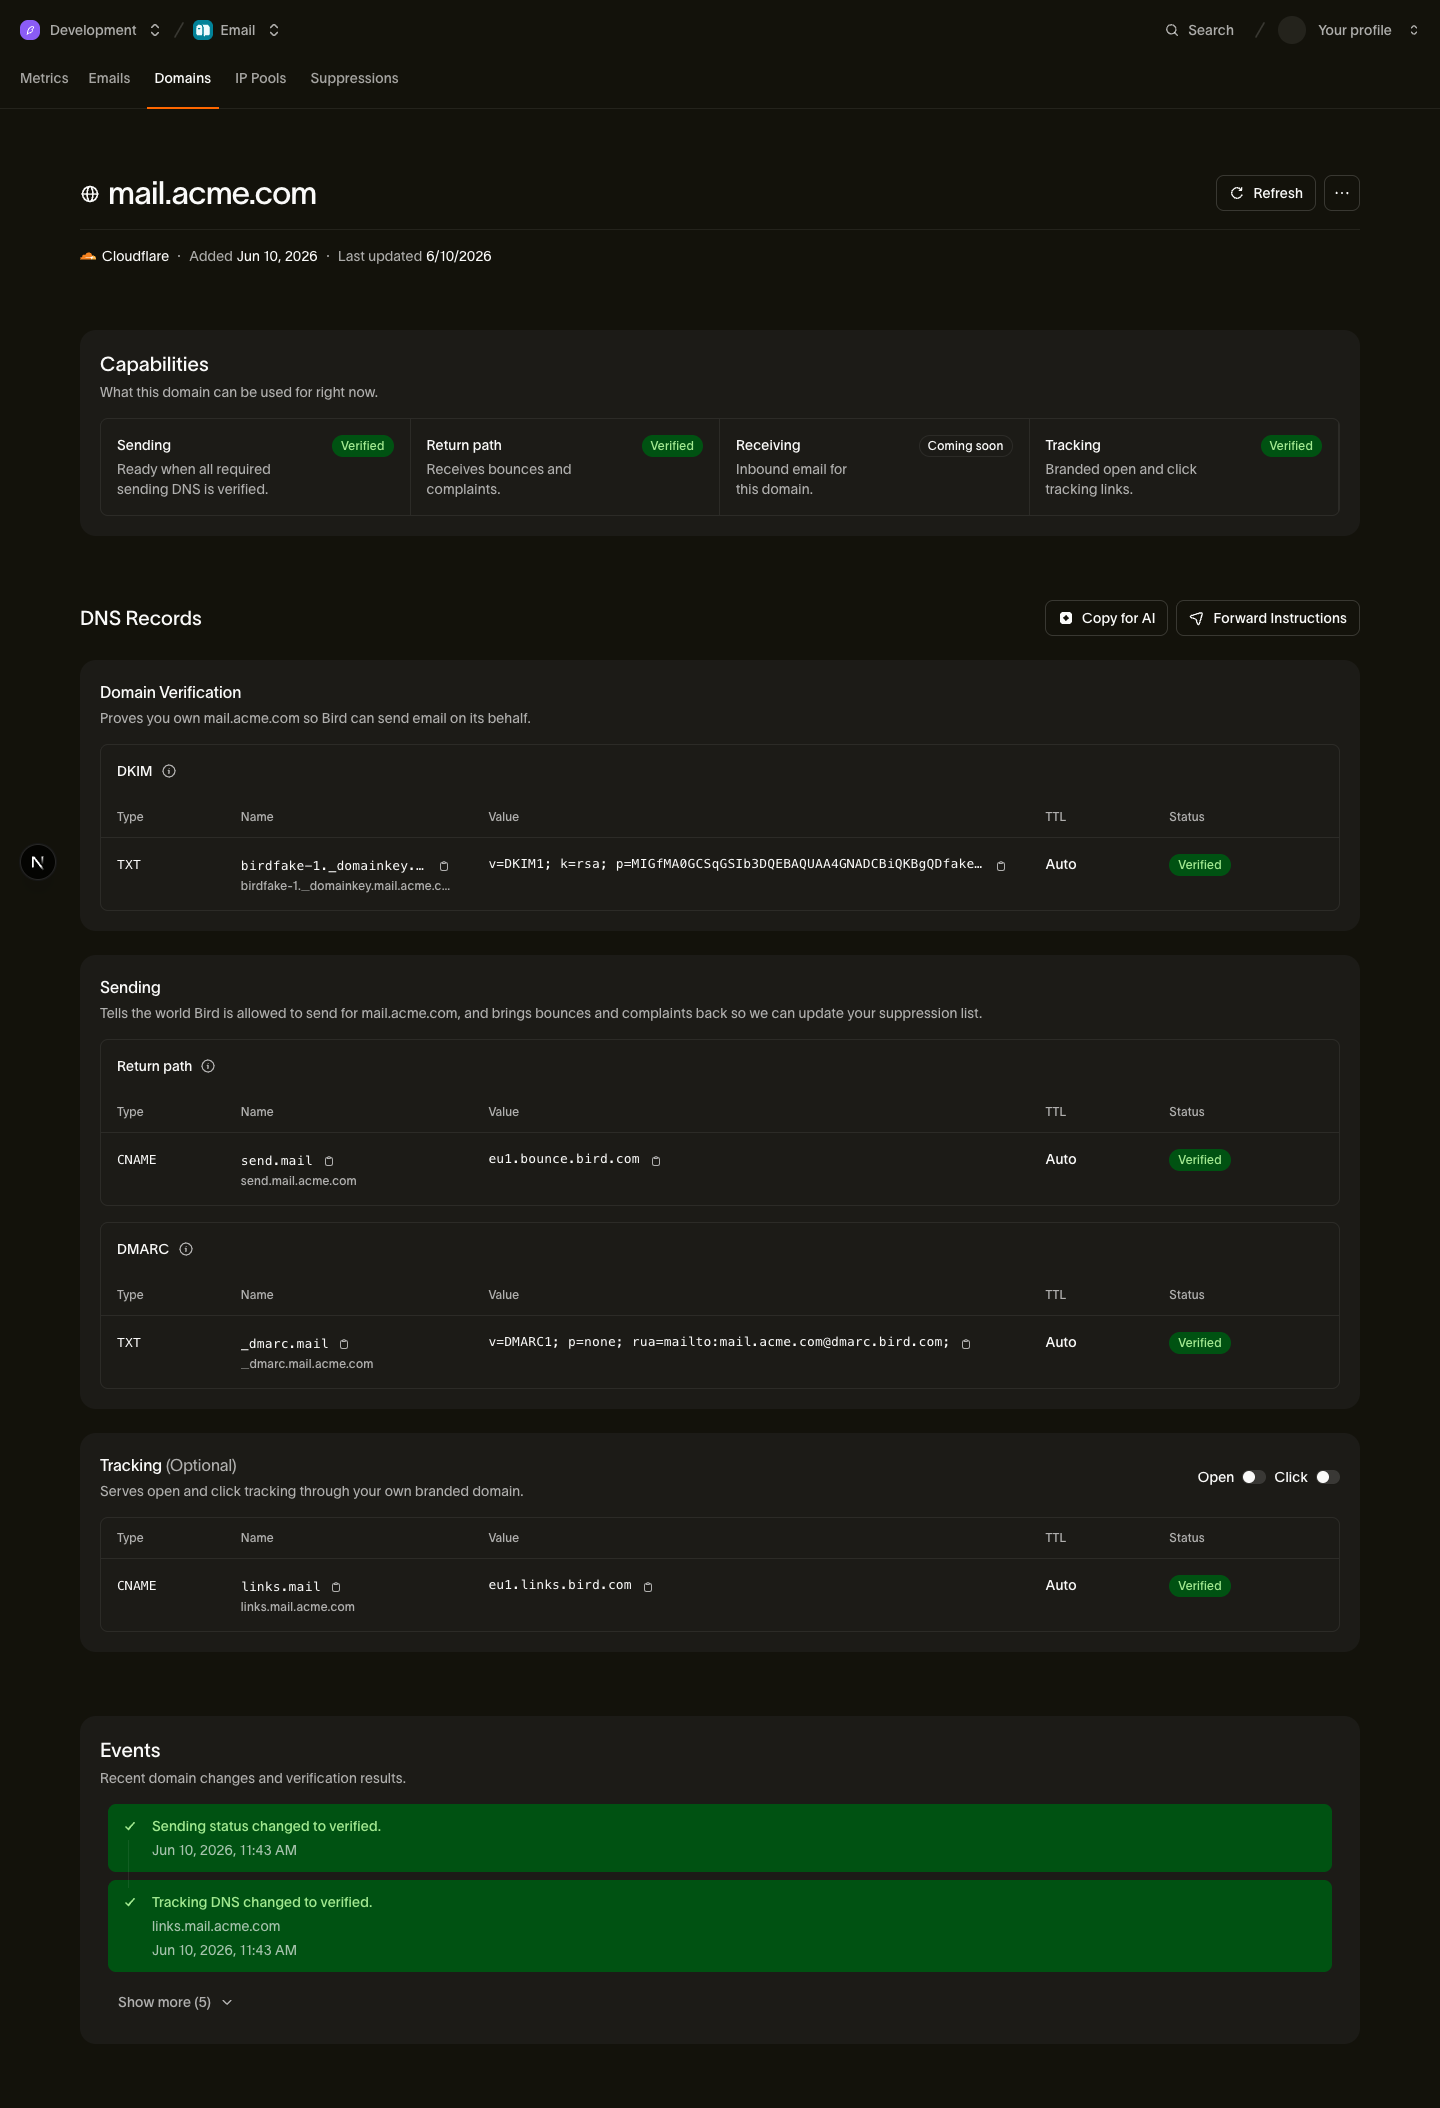
Before you start, open your domain's detail page in the Bird dashboard and keep it visible. Copy each host and value from that page.
Find your DNS zone
- Sign in to the Azure portal.
- In the search bar, type DNS zones and select it from the results.
- Click the zone that matches your sending domain (for example
example.com). - You land on the zone's overview, which lists the existing record sets. Select + Record set to add each Bird record.
Add the records
For each record, select + Record set and fill in the record-set pane. The Name field is relative to the zone: enter only the part before your domain name (and @ would mean the zone apex itself, which none of Bird's records use).
DKIM (TXT)
- Click + Record set.
- Name: paste the DKIM host from Bird, then remove your domain from the end. For
example.com, enter<selector>._domainkey. - Type: select TXT from the dropdown.
- Value: paste the DKIM value exactly as shown in Bird (
v=DKIM1; k=rsa; p=...). If Azure rejects it as too long for a single string, run it through the DNS record splitter to create accepted quoted chunks. - Leave TTL at the default and click OK (or Add in the newer portal experience).
Return-path (CNAME)
- Click + Record set.
- Name:
send(or whatever subdomain your Bird dashboard shows before your domain name). - Type: select CNAME.
- Alias: paste the value from Bird, for example
<region>.bounce.bird.com. - Click OK.
Tracking (CNAME, optional)
This optional record enables branded open and click tracking. Your domain can verify and send without it.
- Click + Record set.
- Name:
links(or the subdomain shown in Bird). - Type: select CNAME.
- Alias: paste the value from Bird, for example
<region>.links.bird.com. - Click OK.
DMARC (TXT)
- Click + Record set.
- Name:
_dmarc. - Type: select TXT.
- Value: paste the DMARC value from Bird, for example
v=DMARC1; p=none; rua=mailto:dmarc-agg@dmarc.bird.com;. - Click OK. Keep an existing valid DMARC record at this domain or a parent domain.
Azure gotchas
- Names are relative to the zone. Azure appends the zone name to whatever you type in the Name field: entering
send.example.comin theexample.comzone createssend.example.com.example.com. Enter only the leading label(s);@is reserved for the zone apex. - Pick the type before you fill in values. The pane's value fields change with the record type dropdown: if you do not see an Alias field for a CNAME or a Value box for a TXT record, check the type selection first.
- A CNAME record set holds one value. Azure also refuses a CNAME at a name where another record exists. If the portal rejects the record, check for a conflict at the same name.
- The zone only matters if it is delegated. An Azure DNS zone answers queries only when your registrar's name servers point at it. On the zone's overview, copy the four
*.azure-dns.*name servers and confirm they match the NS records set at your registrar: otherwise the records you add here are invisible to the rest of the internet.
After you publish
Bird checks your DNS automatically. To confirm what you published:
- Open Recordsets in your Azure DNS zone and find each record you added.
- Open the record set and compare its name, type, TTL, and value with your intended settings. Copy record values from Bird exactly. If you correct a value, save it with Apply. See Manage Azure DNS record sets.
- Return to the domain details in Bird and select Refresh to check the published records. If the domain remains pending, see Verification delays.
Next steps
- Sending domains: adding and managing domains end to end
- DKIM, SPF & DMARC: what each record proves and why Bird does not publish an apex SPF record
- Verification delays: what to check when a domain stays pending
Related resources
Continue with the documentation, guides and examples for this topic.