Receiving email
Bird can receive email as well as send it. Every message Bird receives lands in the same place regardless of how it arrived: the Receiving tab of the Emails page, the inbound-messages API, and the email.received webhook. The two ways in differ only in setup effort and what address the mail is sent to.
- A forwarding address is a Bird-generated mailbox like mfzxq2lom5uxi3lb@eu1.inbound.bird.com. No domain, no DNS: you point an existing inbox's forwarding rule at it and Bird receives every message.
- Receiving on your own domain publishes MX records for a subdomain you control (say inbound.acme.com), after which mail sent to any address at that subdomain is delivered into Bird.
Start with a forwarding address if you want to try receiving or to pipe an existing support inbox into Bird. Set up domain receiving when you want mail addressed directly to your own domain.
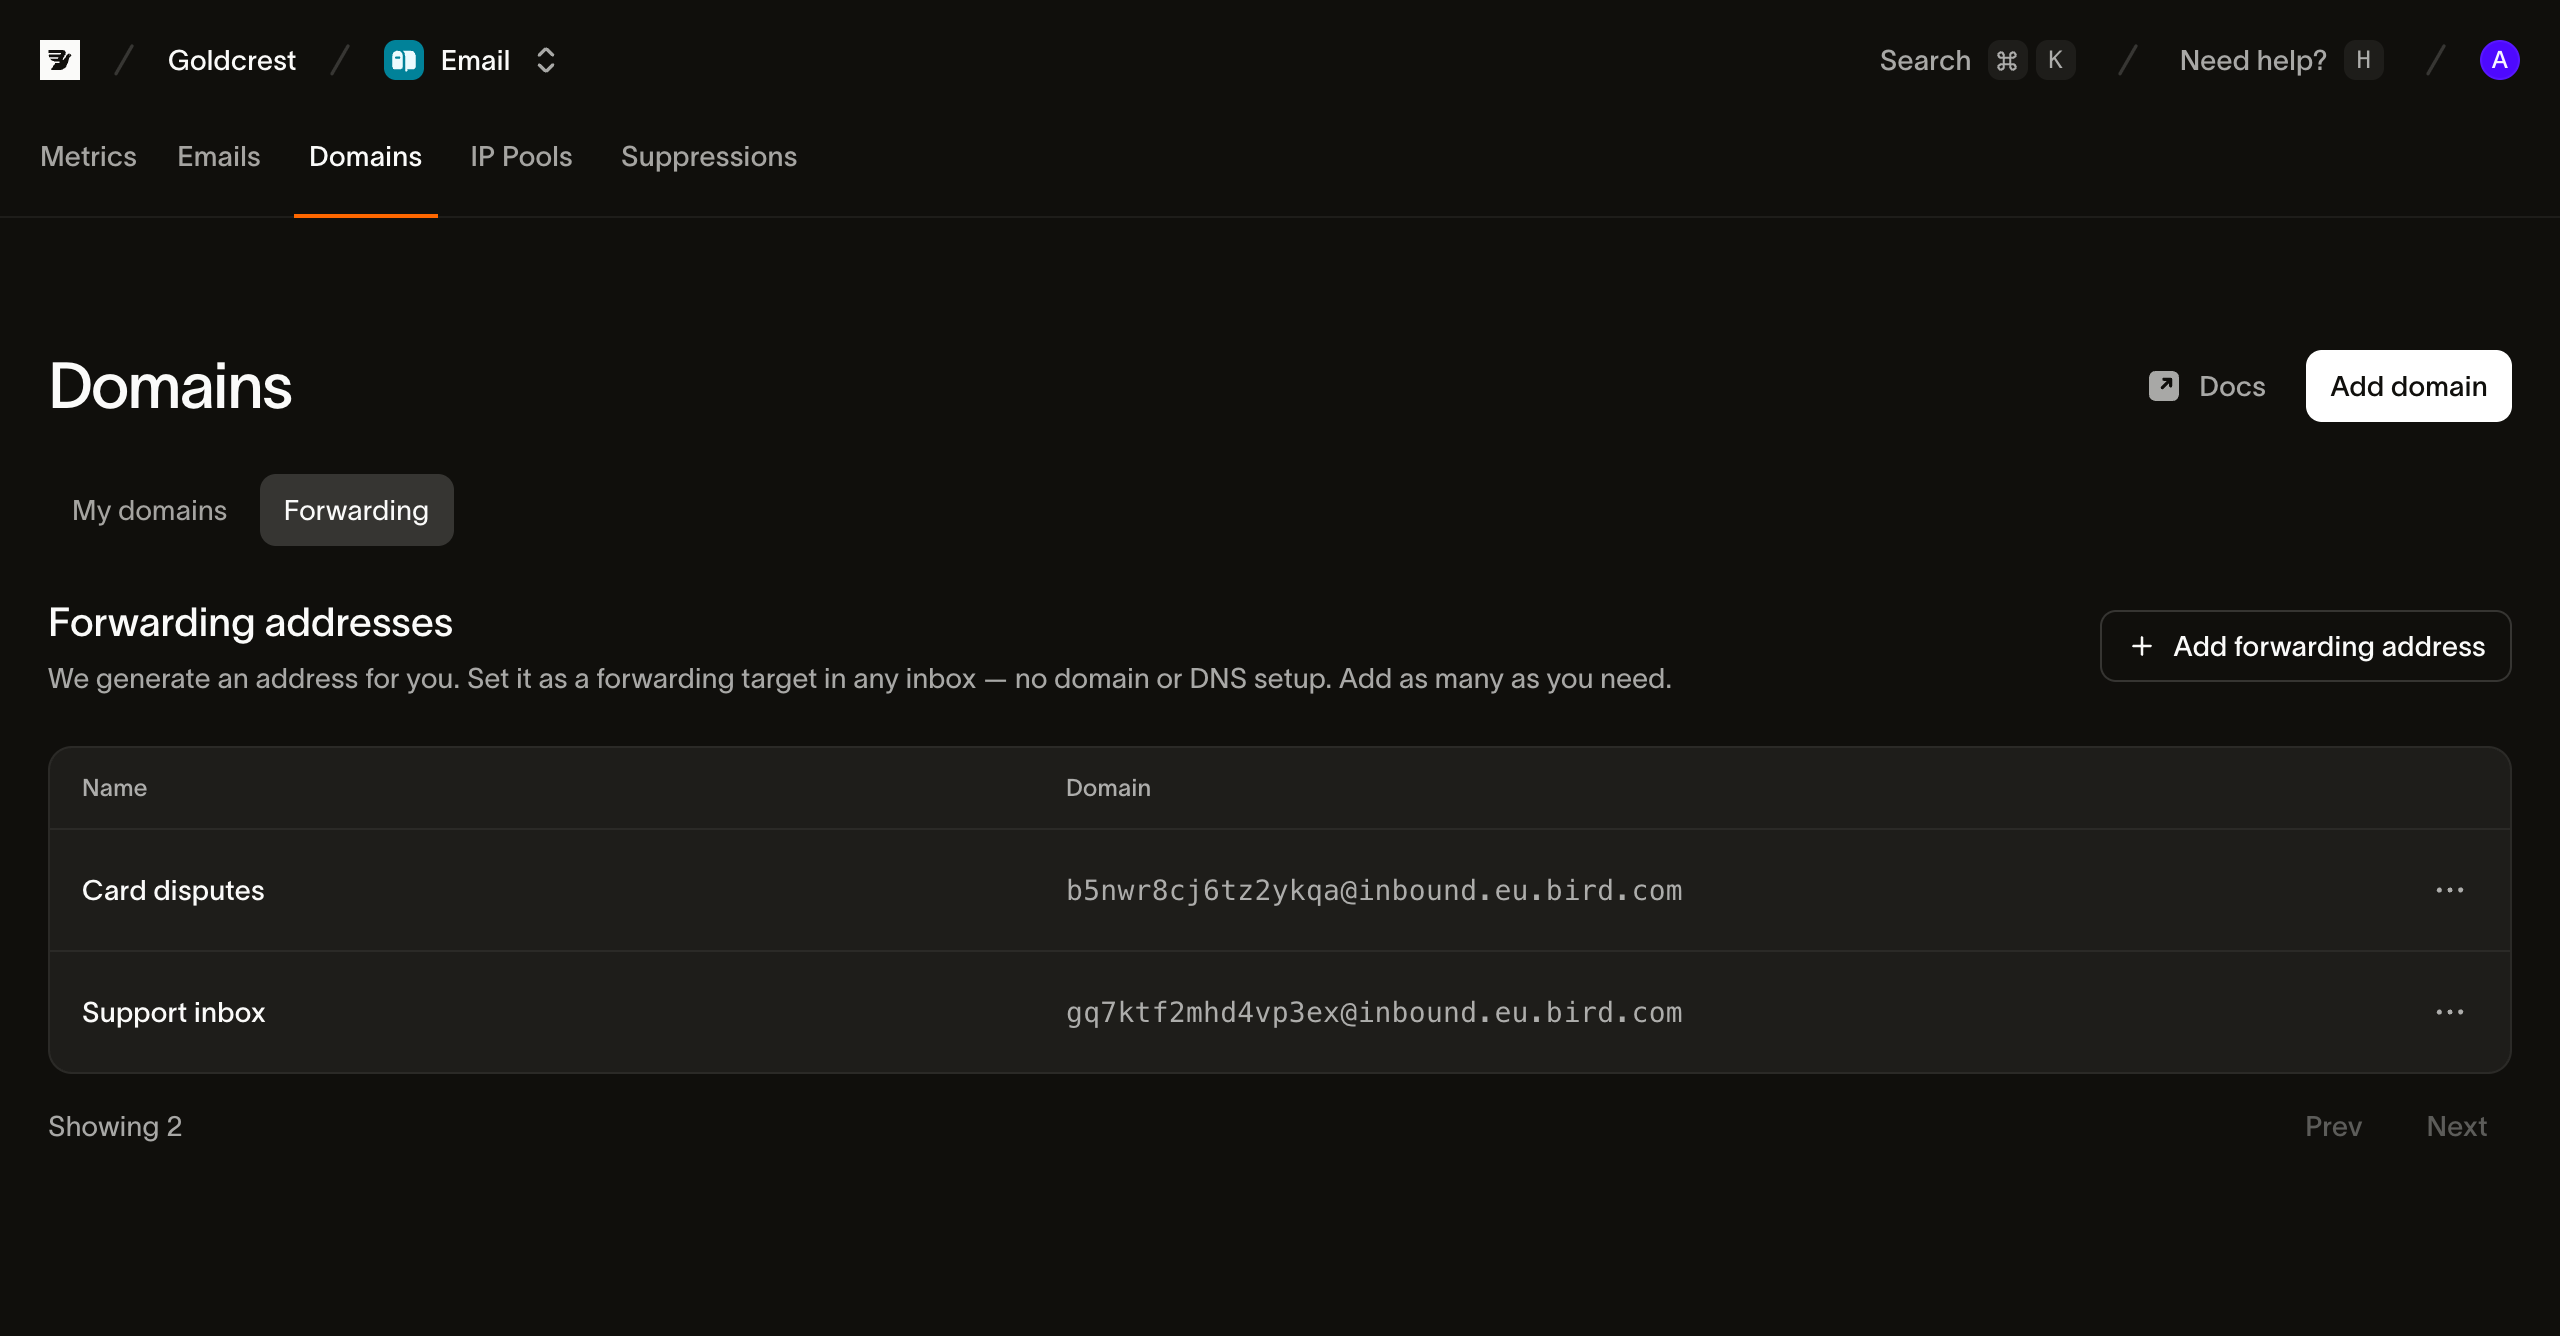
Forwarding addresses
Add one from the Forwarding tab of the Domains page: Add forwarding address, give it a name ("Support inbox"), and Bird mints the address. The address itself is random, fixed, and never changes; the name is a label you can rename at any time. Each address is independent, so a deleted address stops receiving without affecting the others.
Programmatically, POST /v1/email/inbound-addresses does the same thing (CLI: bird email inbound-addresses create). The response carries the generated address, its id, and your label.
Then set that address as the forwarding target wherever the mail lives today: a Gmail or Google Workspace forwarding rule, an Outlook rule, or your helpdesk's forwarding setting. Bird receives whatever is forwarded, parses it, and stores it as an inbound message.
Receiving on your own domain
Domain receiving is a capability of a sending domain, so the domain must be registered and DKIM-verified first. Use a dedicated subdomain (inbound.acme.com), never your apex: receiving is enabled on the domain's own registration, and apex MX records would capture your corporate mail.
Enable it from the dashboard on the domain's detail page (open your domain from the Domains page): the Receiving (Optional) card at the bottom has the toggle and lists the MX records to publish. Turn the toggle on, then add those MX records at your DNS provider. A domain that hasn't verified DKIM can't be switched on yet, and neither can a domain that already receives inbound mail for another organization.
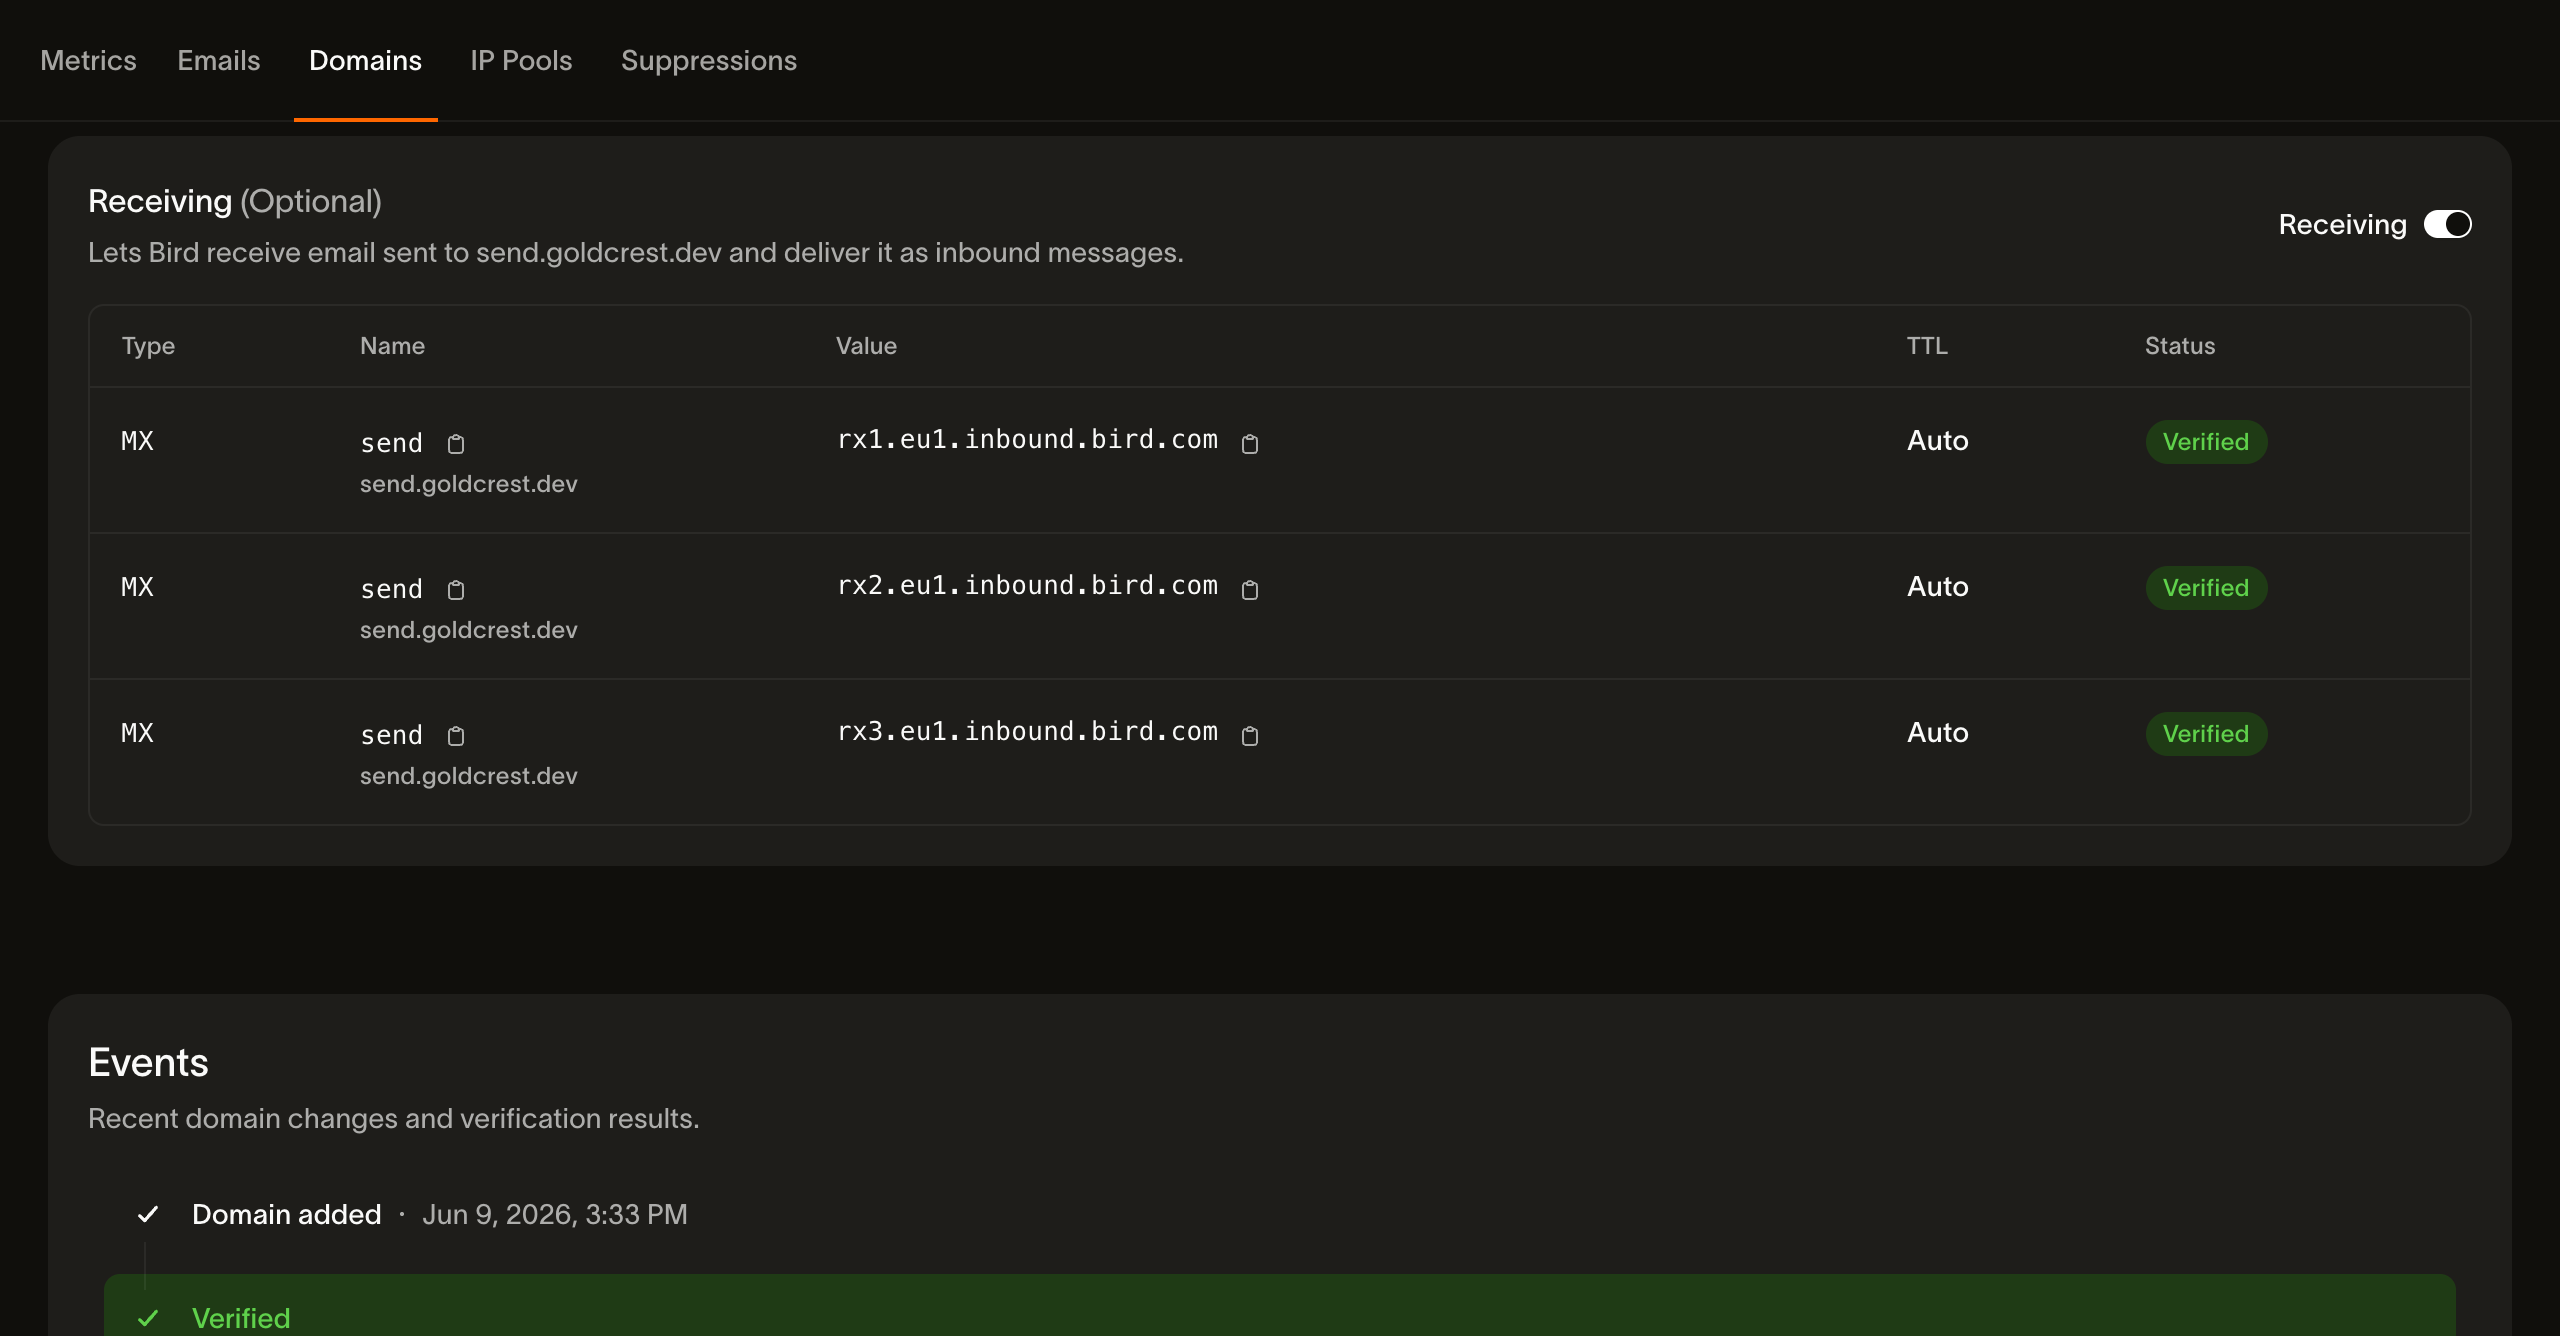
Once enabled, the receiving status moves through the same lifecycle as the sending records: pending while Bird checks DNS for the MX records, then verified once they resolve to Bird. From that point, mail sent to any local-part at the domain (support@, orders@, anything) is delivered as an inbound message. Turning the toggle off stops delivery of inbound mail; the MX records stay listed on the domain as a reference, with their status back at pending.
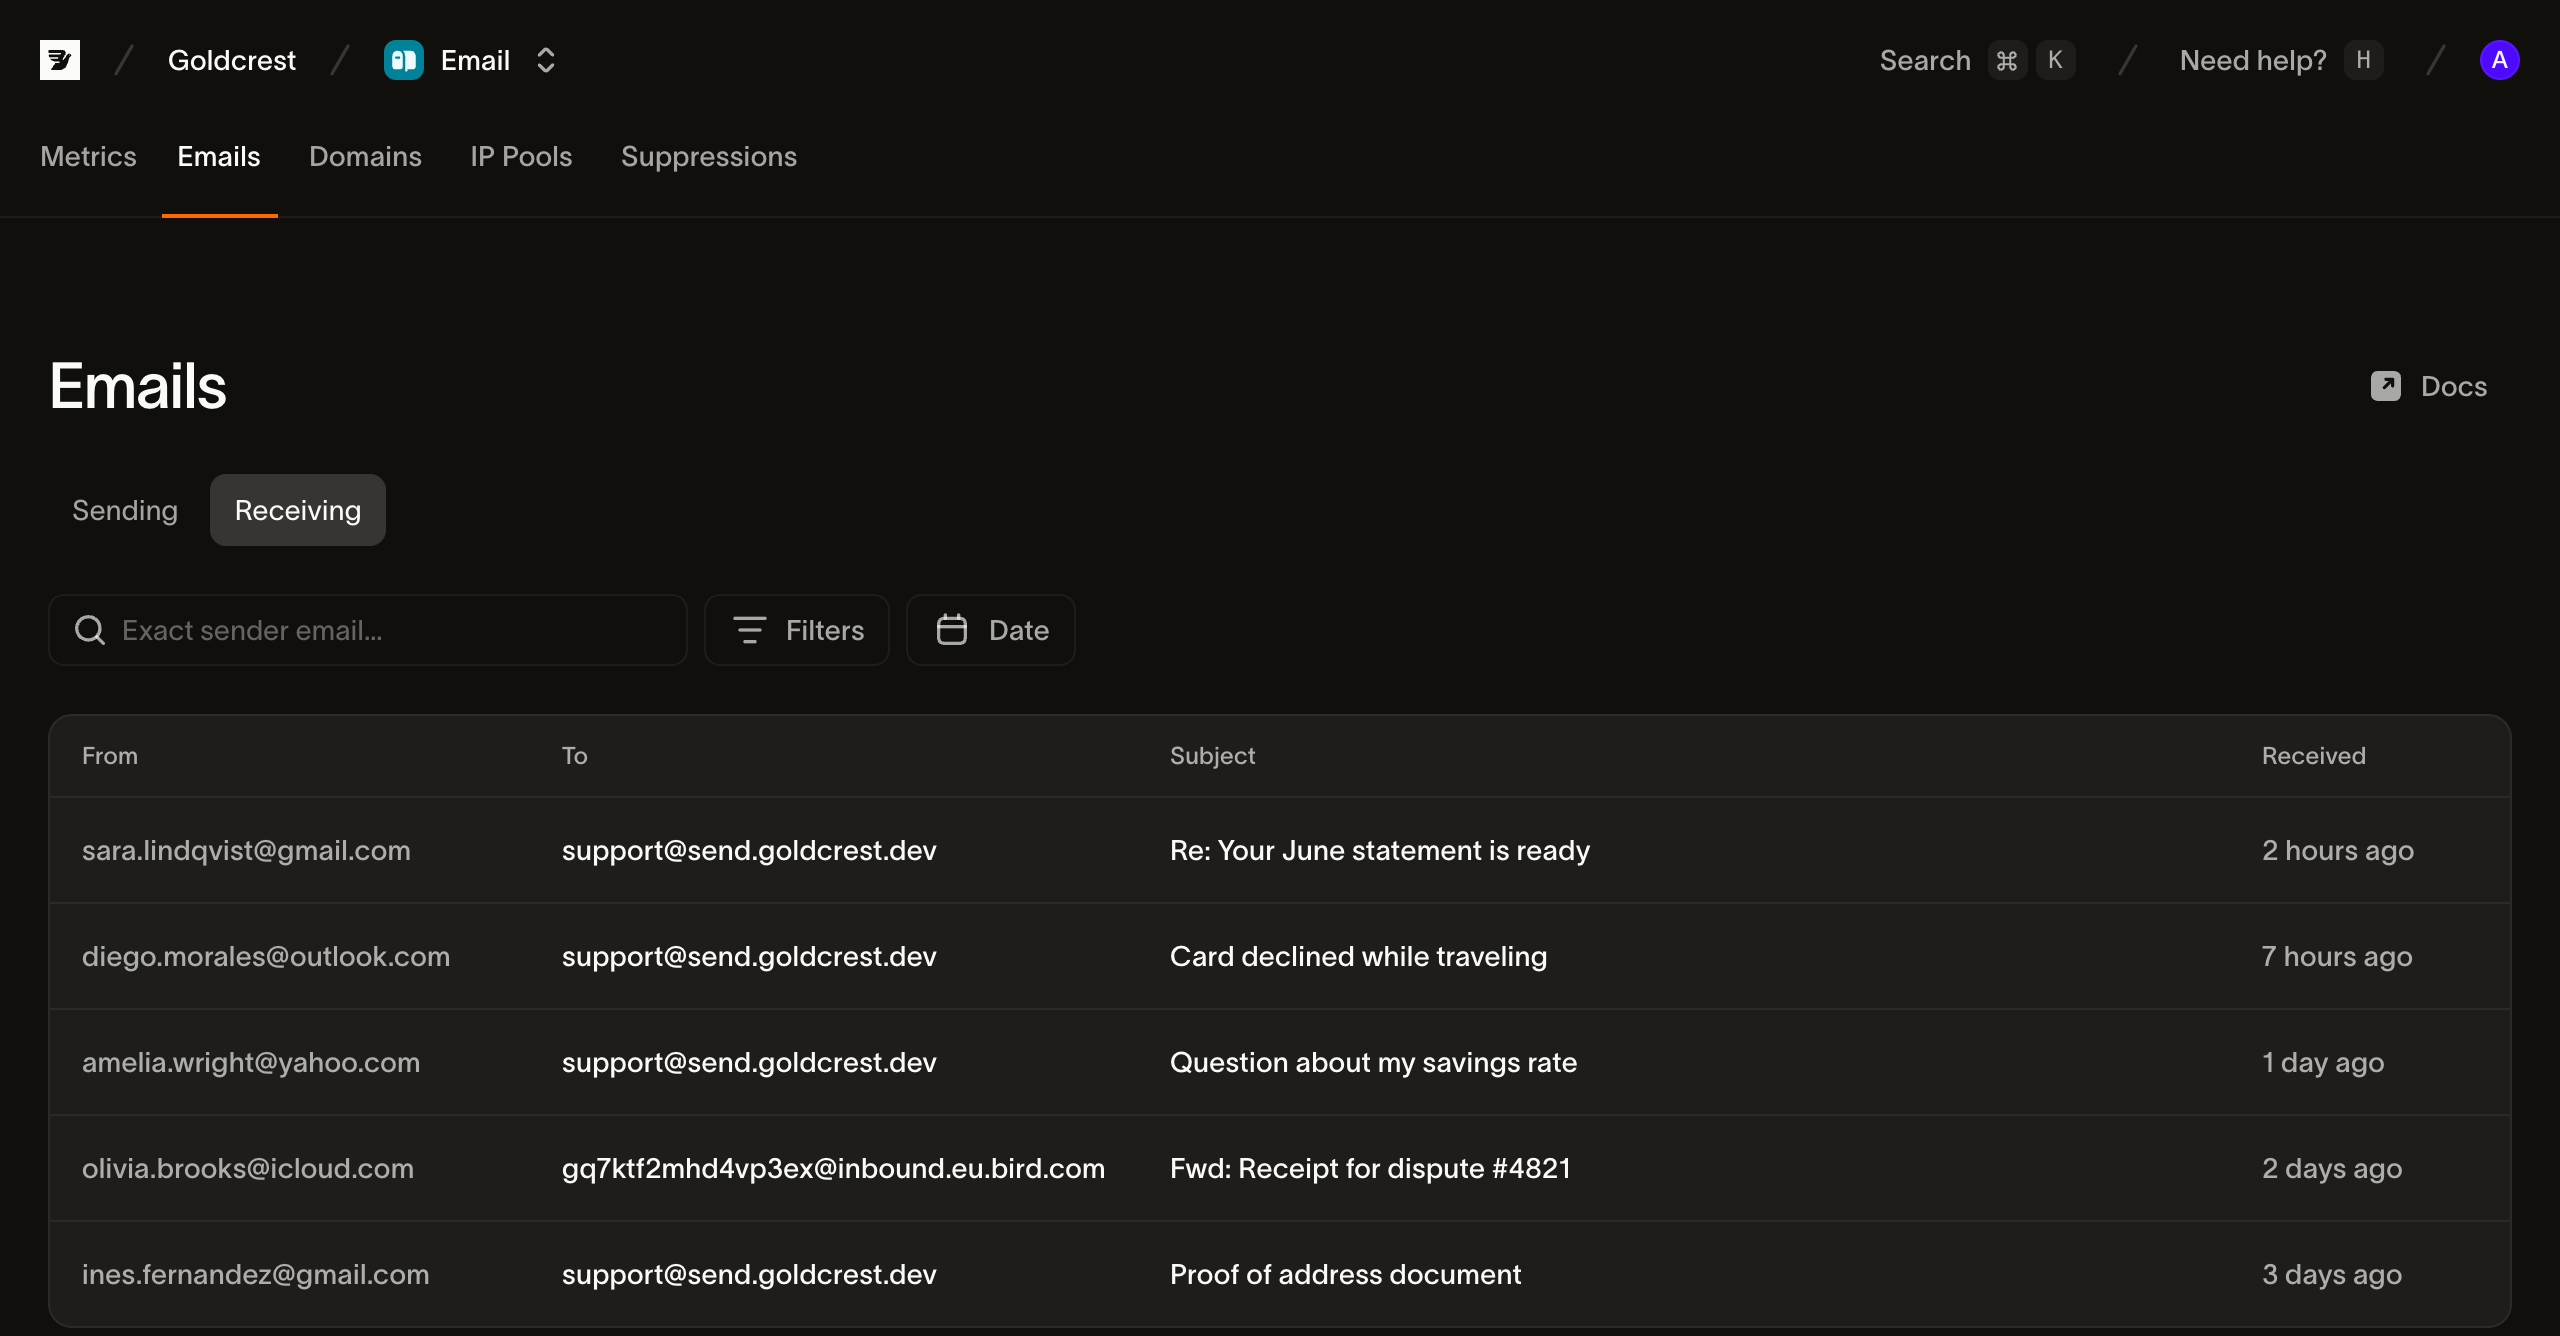
Reading what you receive
The Receiving tab of the Emails page lists received messages newest first, with sender, recipient, subject, and received time; a search box finds messages from an exact sender address, and a date filter narrows the window. Click a row to open the message: a Rendered tab shows the HTML in a sandboxed frame, Text the plain-text body, Details the addressing metadata and attachments (with downloads), and Raw the original MIME source. The header shows three authentication indicators, the SPF, DKIM, and DMARC verdicts Bird recorded when the message arrived, so you can tell authenticated mail from spoofable mail at a glance.
Received emails are retained for 30 days.
The same data is available over the API (CLI: bird email inbound-messages):
- GET /v1/email/inbound-messages lists messages, filterable by sender, inbound address, and received time.
- GET /v1/email/inbound-messages/{id} returns one message's parsed metadata: addressing, subject, threading references, authentication results, and attachment metadata.
- GET /v1/email/inbound-messages/{id}/body returns the HTML and plain-text bodies.
- GET /v1/email/inbound-messages/{id}/attachments lists attachments; each can be downloaded individually.
- GET /v1/email/inbound-messages/{id}/raw returns the original message exactly as received, in RFC 5322 (MIME) format.
Reacting to received mail: the email.received webhook
To process mail as it arrives (route support requests, ingest replies, trigger an agent), subscribe a webhook endpoint to the email.received event. Bird fires it after receiving and parsing each message. The payload carries enough to route and triage without a follow-up call: the inbound_message_id, envelope sender, recipients, subject, the in_reply_to reference, an overall authentication verdict (pass, fail, or unknown), and the individual SPF, DKIM, and DMARC results. When you need the body or attachments, fetch them with the inbound-messages API using the inbound_message_id from the event.
Treat the authentication verdicts as your spam-and-spoofing filter: a message that fails DMARC claims a sender it could not authenticate as, and your handler can quarantine or drop it before any automation acts on it. Treat unknown as unverified rather than trusted.
Next steps
- Sending domains: register and verify the domain you want to receive on.
- Webhooks: endpoints, signatures, and retries for email.received.
- Email log: the sending side of the Emails page.