External Data Sources
Overview
Integrating external data sources into email templates allows for highly personalized and dynamic content, improving engagement and relevance. This guide will walk you through setting up external data sources and utilizing them in your email templates.
External data sources provide dynamic content to your email templates by pulling information from external APIs. This is useful for:
- Personalizing content based on an external feed
- Displaying real-time data like flight status from an API
- Customizing links by passing parameters and getting back final links through an external tool
Create an external data source
- Navigate to Marketing app and click on Content
- Under Content, Click on External data sources > Create External Data Source

- You can give it a name. This should be a continuous string with no spaces
- Give the link for your API
- Define if you want the content to be dynamically updated or want to refresh manually once added to email and then do not want it to update.
- You can choose to have no authentication or define type of authentication and also add any headers

- Once you click on Save Configuration, the external data source is created
- Once created, you can test your configuration to see what output you get by clicking on Test Config as shown below.

Using External Data Sources in Email
Once your external data source is set up correctly, you can use its output in the email template using liquid templating language.
Using External Data Source for Content Feed
For showing a content feed, you can create an API which gives a json with many items of the content feed. As an example it can look like below:
{
  "feed": {
    "version": "1.0",
    "title": "sample-data-feed",
    "items": [
      {
        "title": "Meet the Full Cast",
        "link": "https://bird.com/article",
        "description": "See who's joining previously announced stars Katie Brayben and Christian Borle in the Elton John-Jake Shears-James Graham musical.",
        "thumbnail": "https://assets.bird.com.jpg",
        "date": "2024-08-28T11:21:00",
        "creator": "Joe Black"
      },
      {
        "title": "Stars in ASL American",
        "link": "https://bird.com/article",
        "description": "Center Theatre Group is teaming up with Deaf West Theatre to reopen the Mark Taper Forum with a new production of the Green Day musical after bringing revivals of Big River and Spring Awakening to Broadway.",
        "thumbnail": "https://assets.bird.com.jpg",
        "date": "2024-08-28T11:59:00",
        "creator": "Joe Black"
      }
    ]
  }
}
The above json feed can be used as an API URL while creating an external data source.
Once created, you can refer it in an email template as follows:
- First add an html element and add below code to fetch the external data source by name i.e. {% datafetch "external-data-source-name" %}
- Use the for function in liquid to get all the items in your feed along with the path i.e. {% for in dataFetchResponse. %}.
If you only have one item, this may not be needed
Assuming sample-data-feed is the name of the external data source and feed.items is the path in the json feed to get the items, it will look like below:
{% datafetch "sample-data-feed" %}
{% for item in dataFetchResponse.feed.items %}
- After this is added, you can then add any image, text, button elements and refer to the external data source as below assuming the sample-data-feed structure:
{{item.title}} - To show title in a text element
{{item.description}} - To show description in a text element
{{item.link}} - To add a link in a button element
{{item.thumbnail}} - To add a Image URL source in image element
- Now add another html block to end the fetching of external data source and the for function as shown below
{% endfor %}
{% enddatafetch %}
To preview your email, you can switch over to preview and see how your content feed looks like
Note: If you have a static feed, you can refresh it here manually by selecting the external data source under Refresh External Data Source dropdown.

Using External Data Source for Customizing URLs
You can also use external data sources along with variables in the API URL. This helps to pass any parameters to an external API and give back response to be added to an email template
For example, you can use an API URL like below passing variables as shown below

To use this external data source in an email template, you have to provide the values of the variables as well in the liquid tag:
- Add the first html element as {% datafetch "name", "variable1", "variable1 value", "variable2, "variable2 value" %}
In below example, the first line avoids causing issues when email address has a + sign. The second line actually initiates the external data flow with the variables. You can give static values as"value" or you can provide variable references like contact.attributes.userId.
{%- assign email_for_datafetch = contact.attributes.email_address | url_encode -%}
{% datafetch "GenerateLink","email", email_for_datafetch,"referenceId", contact.attributes.userId, "locale", contact.attributes.locales[0],"name", contact.attributes.name %}
GenerateLink is the name of the external data source above.
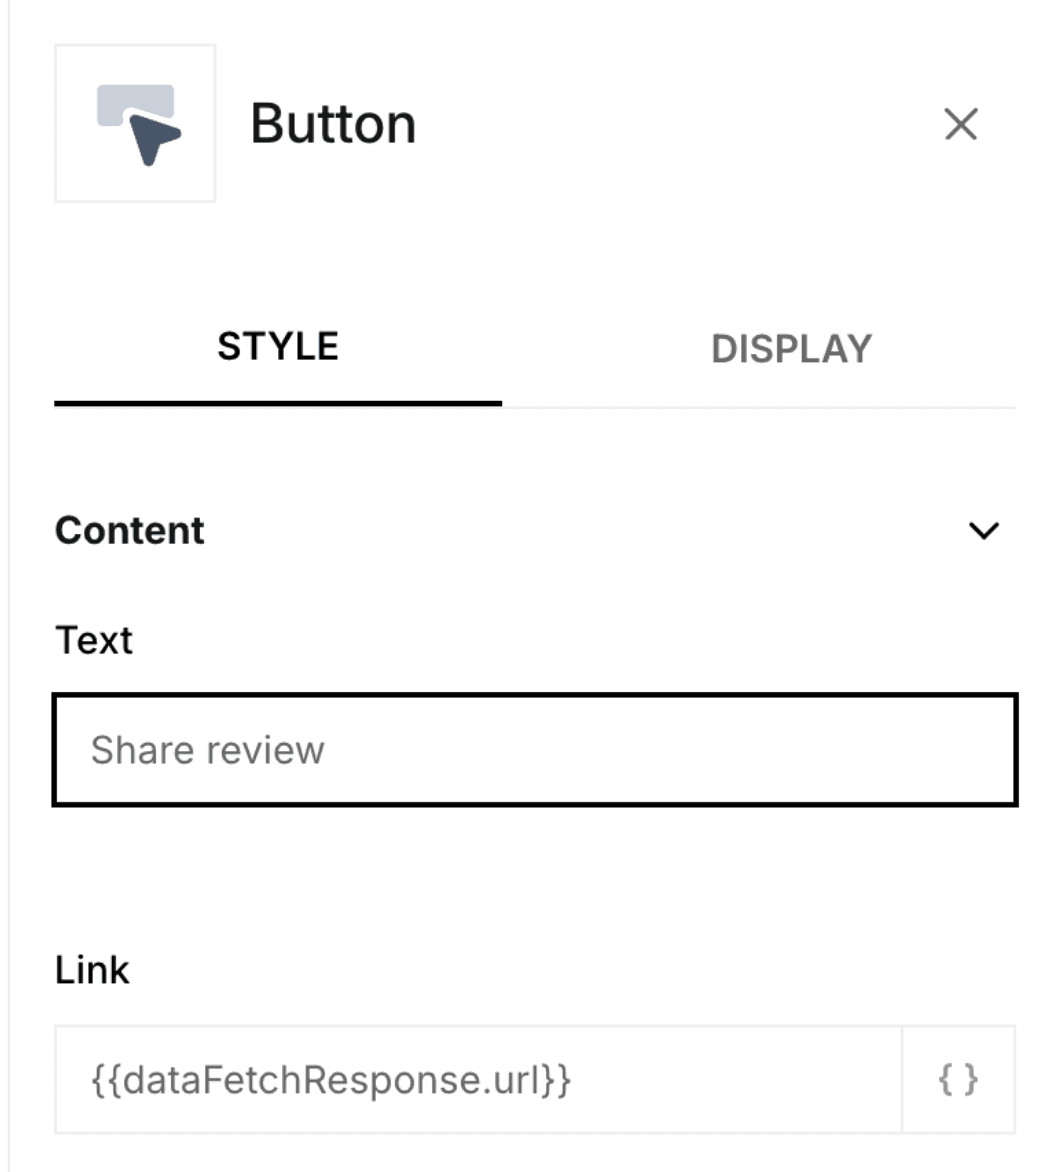
- To render a customized link you can use a button element with the link defined as {{dataFetchResponse.url}} where url contains the response from your API
After this, add the closing html element as below:
{% enddatafetch %}