Zweryfikuj pierwszego klienta
Bird Verify potwierdza, że klient kontroluje adres e-mail lub numer telefonu. Prosisz Bird o wysłanie jednorazowego kodu weryfikacyjnego. Klient wpisuje go w Twojej aplikacji, a Ty pytasz Bird, czy kod się zgadza. Bird generuje i dostarcza kod oraz pilnuje wygaśnięcia i limitów prób. Twoja aplikacja nigdy nie otrzymuje ani nie przechowuje wygenerowanego kodu.
Ten quickstart weryfikuje Twój własny adres e-mail, co nie wymaga żadnej konfiguracji. Bird wysyła kody e-mail przez współdzielonego nadawcę Bird Verify, więc nie potrzebujesz domeny ani salda. Po doładowaniu SMS weryfikacja numeru telefonu korzysta z tych samych dwóch wywołań.
1. Utwórz klucz API
W dashboardzie przejdź do Platform tools > API keys i utwórz klucz. Klucze są przypisane do regionu i wyglądają jak bk_us1_... lub bk_eu1_...; region w prefiksie wskazuje, który host API wywołać: https://us1.platform.bird.com lub https://eu1.platform.bird.com.
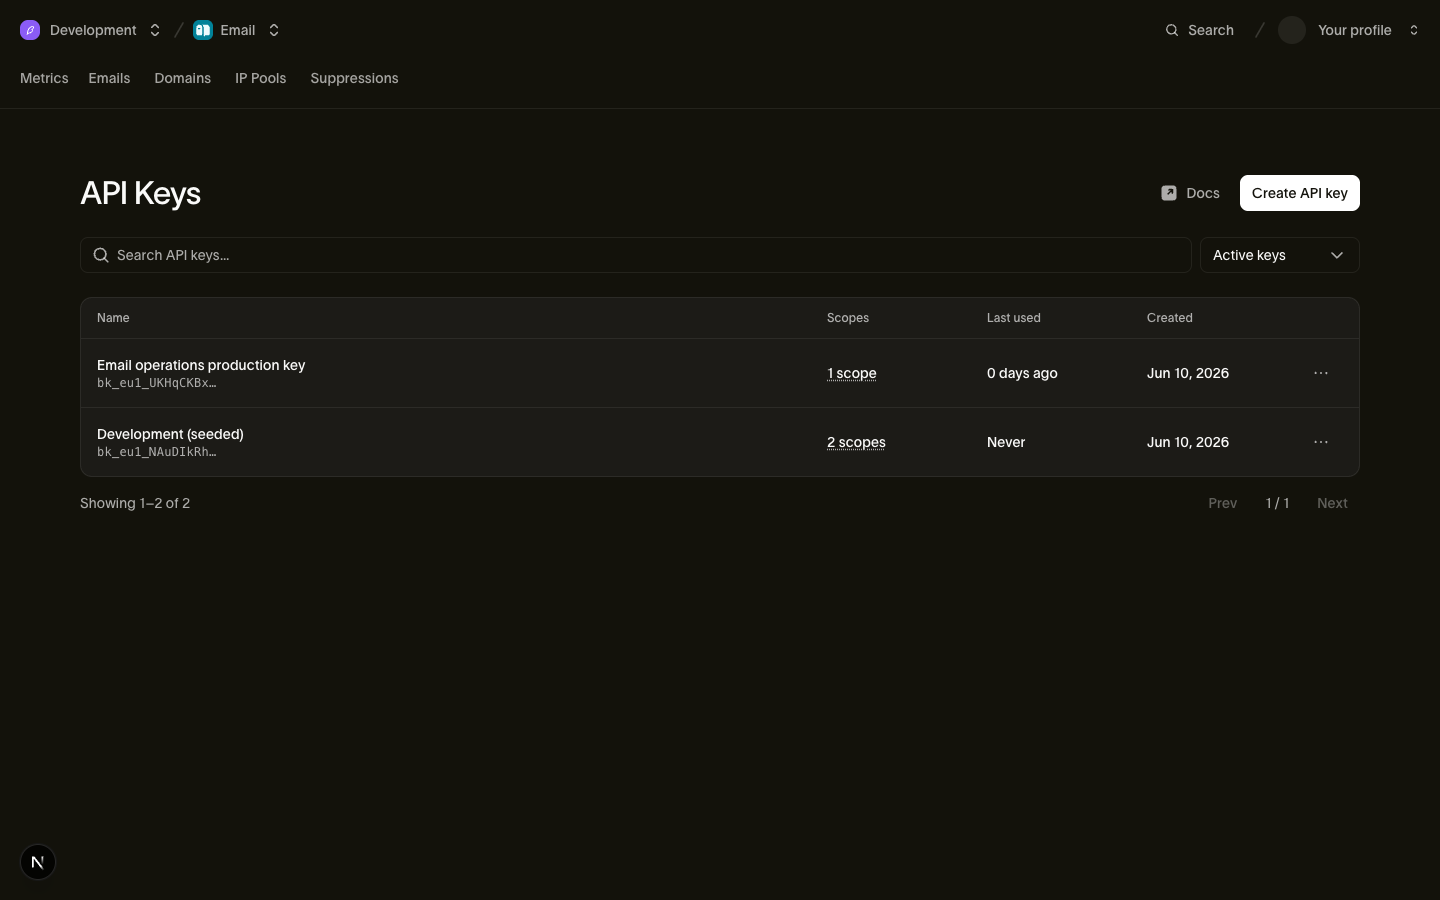
Pełny klucz jest wyświetlany tylko raz, w momencie utworzenia. Skopiuj go w bezpieczne miejsce, a następnie wyeksportuj do przykładów wysyłki:
export BIRD_API_KEY="bk_us1_..."2. Wyślij kod
Utwórz weryfikację dla adresu, który chcesz potwierdzić. Jedyne wymagane pole to to. Użyj własnego adresu e-mail, żeby móc odczytać kod. Zainstaluj Bird SDK dla swojego języka, korzystając z quickstartu SDK.
W kartach SDK zamień przykładowy klucz API i user@example.com przed uruchomieniem kodu. Karta CLI korzysta z Twojego loginu, a karta cURL używa BIRD_API_KEY.
import { BirdClient } from "@messagebird/sdk";

const bird = new BirdClient({ apiKey: "bk_XXXXXXXXXXXXXXXXXXXXXXXX" });

const verification = await bird.verify.verifications.create({
  to: { email: "user@example.com" },
});

console.log(verification.id, verification.status);
from bird import APIError, Bird
with Bird(api_key="bk_XXXXXXXXXXXXXXXXXXXXXXXX") as client:
try:
verification = client.verify.verifications.create(
to={"email": "user@example.com"},
)
print(verification.id, verification.status)
except APIError as err:
print("could not start the verification:", err)package main
import (
"context"
"fmt"
"log"
bird "github.com/messagebird/bird-sdk-go"
"github.com/messagebird/bird-sdk-go/option"
)
func main() {
client, err := bird.NewClient(option.WithAPIKey("bk_XXXXXXXXXXXXXXXXXXXXXXXX"))
if err != nil {
log.Fatal(err)
}
verification, err := client.Verify.Verifications.Create(context.Background(), bird.VerifyVerificationsCreateParams{
To: bird.VerificationTo{Email: bird.Email("user@example.com")},
})
if err != nil {
log.Fatal(err)
}
fmt.Println(verification.Id, *verification.Status)
}<?php
declare(strict_types=1);
require __DIR__ . '/../vendor/autoload.php';
use MessageBird\Bird;
use MessageBird\Wire\Model\VerificationCreateRequest;
use MessageBird\Wire\Model\VerificationTo;
$bird = new Bird('bk_XXXXXXXXXXXXXXXXXXXXXXXX');
$verification = $bird->verify->verifications->create(
(new VerificationCreateRequest())
->setTo((new VerificationTo())->setEmail('user@example.com')),
);
echo $verification->getId(), ' ', $verification->getStatus(), "\n";bird verify verifications create --email user@example.comcurl -X POST https://us1.platform.bird.com/v1/verify/verifications \
-H "Authorization: Bearer $BIRD_API_KEY" \
-H "Content-Type: application/json" \
-d '{
"to": { "email": "user@example.com" }
}'Jeśli Twój klucz zaczyna się od bk_eu1_, wywołaj zamiast tego https://eu1.platform.bird.com.
Bird przyjmuje żądanie i rozpoczyna wysyłanie kodu:
{
  "id": "vrf_01ky7q1fdze3695yvyz7z9nm3a",
  "status": "pending",
  "reason": null,
  "to": { "email": "user@example.com" },
  "channels": [{ "channel": "email" }],
  "last_channel": "email",
  "expires_at": "2026-07-23T14:55:58Z",
  "verified_at": null,
  "created_at": "2026-07-23T14:45:58Z",
  "updated_at": "2026-07-23T14:45:58Z"
}
Nie musisz przechowywać identyfikatora weryfikacji: sprawdzenie w kroku 3 jest identyfikowane tym samym odbiorcą. E-mail przychodzi od Bird Verify <otp@verify.bird.com> z tematem "Your verification code" i sześciocyfrowym kodem; sama wiadomość informuje, kiedy wygasa. Długość kodu, czas życia, limit prób i czas między ponownymi wysyłkami to ustawienia obszaru roboczego, a ustawienia weryfikacji zawierają wartości domyślne i zakresy.
3. Sprawdź kod
Weź kod ze skrzynki odbiorczej i wyślij go, identyfikując tym samym odbiorcą:
import { BirdClient } from "@messagebird/sdk";

const bird = new BirdClient({ apiKey: "bk_XXXXXXXXXXXXXXXXXXXXXXXX" });

const result = await bird.verify.verifications.check({
  to: { email: "user@example.com" },
  code: "123456",
});

console.log(result.success);
from bird import APIError, Bird
with Bird(api_key="bk_XXXXXXXXXXXXXXXXXXXXXXXX") as client:
try:
result = client.verify.verifications.check(
to={"email": "user@example.com"},
code="123456",
)
print(result.success)
except APIError as err:
print("could not check the passcode:", err)package main
import (
"context"
"fmt"
"log"
bird "github.com/messagebird/bird-sdk-go"
"github.com/messagebird/bird-sdk-go/option"
)
func main() {
client, err := bird.NewClient(option.WithAPIKey("bk_XXXXXXXXXXXXXXXXXXXXXXXX"))
if err != nil {
log.Fatal(err)
}
result, err := client.Verify.Verifications.Check(context.Background(), bird.VerifyVerificationsCheckParams{
To: bird.VerificationTo{Email: bird.Email("user@example.com")},
Code: "123456",
})
if err != nil {
log.Fatal(err)
}
fmt.Println(*result.Success)
}<?php
declare(strict_types=1);
require __DIR__ . '/../vendor/autoload.php';
use MessageBird\Bird;
use MessageBird\Wire\Model\VerificationCheckRequest;
use MessageBird\Wire\Model\VerificationTo;
$bird = new Bird('bk_XXXXXXXXXXXXXXXXXXXXXXXX');
$result = $bird->verify->verifications->check(
(new VerificationCheckRequest())
->setTo((new VerificationTo())->setEmail('user@example.com'))
->setCode('123456'),
);
echo $result->getSuccess() ? 'verified' : 'not verified', "\n";bird verify verifications check 123456 --email user@example.comcurl -X POST https://us1.platform.bird.com/v1/verify/verifications/check \
-H "Authorization: Bearer $BIRD_API_KEY" \
-H "Content-Type: application/json" \
-d '{
"to": { "email": "user@example.com" },
"code": "123456"
}'Poprawny kod zwraca success: true, a osadzona weryfikacja zmienia status na verified:
{
  "success": true,
  "reason": null,
  "attempts_remaining": null,
  "verification": {
    "id": "vrf_01ky7q1fdze3695yvyz7z9nm3a",
    "status": "verified",
    "reason": null,
    "to": { "email": "user@example.com" },
    "channels": [{ "channel": "email" }],
    "last_channel": "email",
    "expires_at": "2026-07-23T14:55:58Z",
    "verified_at": "2026-07-23T14:46:47Z",
    "created_at": "2026-07-23T14:45:58Z",
    "updated_at": "2026-07-23T14:46:47Z"
  }
}
Zanim dodasz ten przepływ do rejestracji, uwzględnij następujące scenariusze:
- Nieudane sprawdzenie zwraca HTTP
200. Odpowiedź zawierasuccess: false,reason(incorrect_code,expiredlubattempts_exhausted) oraz licznikattempts_remaining, dopóki pozostają próby. Rozgałęź logikę w aplikacji na podstawie tego wyniku. Weryfikacja kończy się trwałym niepowodzeniem po wyczerpaniu prób sprawdzenia. - Weryfikacja rozstrzyga się raz. Gdy osiągnie
verified(albo zakończy się niepowodzeniem lub wygaśnie), ponowne sprawdzenie zwraca404. Traktuj pierwszą ostateczną odpowiedź jako wiążącą. Jeśli klient potrzebuje nowego kodu, wywołaj ponownie endpoint tworzenia z tym samym odbiorcą: trwająca weryfikacja zostanie użyta ponownie, a nowy kod zostanie wysłany po upływie czasu między ponownymi wysyłkami.
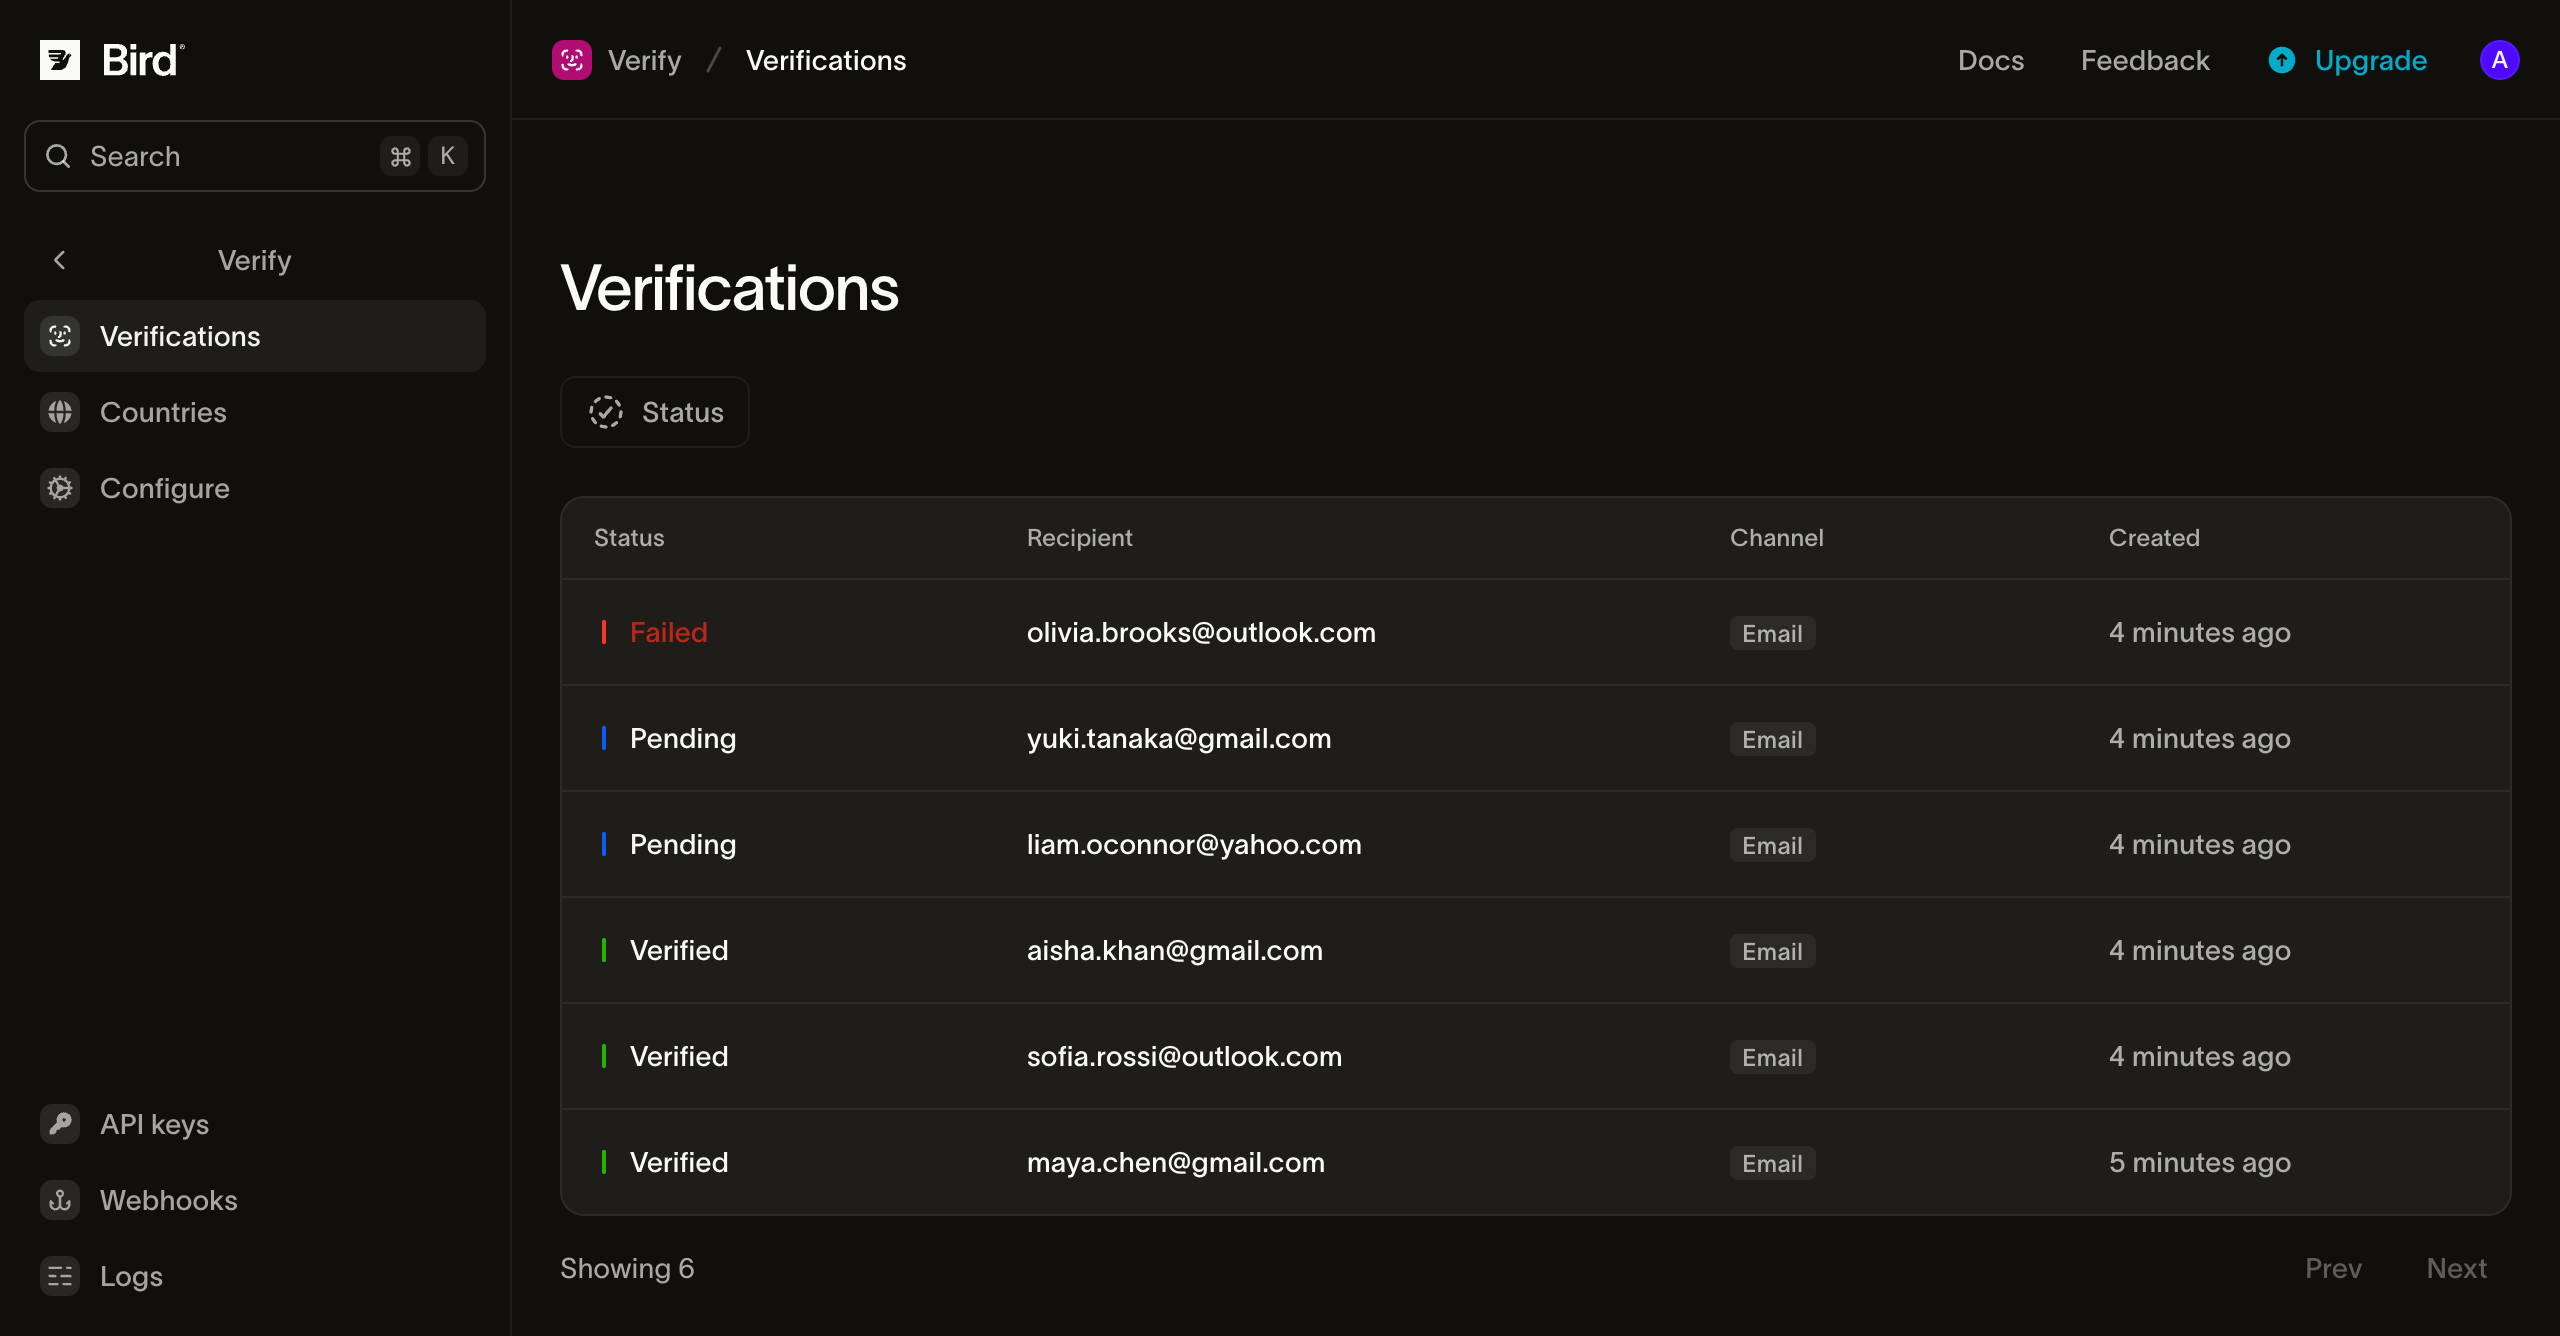
Każda utworzona weryfikacja pojawia się na stronie Verifications wraz ze statusem, odbiorcą, kanałem i czasem. Wygenerowany kod nie jest wyświetlany.
Zweryfikuj numer telefonu
Aby zweryfikować przez SMS, wpisz numer telefonu w to w formacie E.164 zamiast adresu e-mail:
const verification = await bird.verify.verifications.create({
  to: { phone_number: "+15551234567" },
});
console.log(verification.id, verification.status);
verification = client.verify.verifications.create(to={"phone_number": "+15551234567"})
print(verification.id, verification.status)verification, err := client.Verify.Verifications.Create(context.Background(), bird.VerifyVerificationsCreateParams{
To: bird.VerificationTo{PhoneNumber: bird.String("+15551234567")},
})
if err != nil {
log.Fatal(err)
}
fmt.Println(verification.Id, *verification.Status)$verification = $bird->verify->verifications->create(
(new VerificationCreateRequest())->setTo((new VerificationTo())->setPhoneNumber('+15551234567')),
);
echo $verification->getId(), ' ', $verification->getStatus();bird verify verifications create --body-file - <<'JSON'
{
"to": {
"phone_number": "+15551234567"
},
"metadata": {
"correlation_id": "signup-7f3a"
}
}
JSONcurl -X POST "https://{region}.platform.bird.com/v1/verify/verifications" \
-H "Authorization: Bearer $TOKEN" \
-H "Content-Type: application/json" \
-d '{
"to": {
"phone_number": "+15551234567"
},
"metadata": {
"correlation_id": "signup-7f3a"
}
}'Sprawdzenie jest identyczne: zamień email na ten sam phone_number. Dostarczanie na telefon korzysta z salda SMS Twojego obszaru roboczego, a kraj docelowy określa trasę. Bird próbuje najpierw WhatsApp w większości krajów, a SMS najpierw w niektórych. Konfiguracja krajów wyświetla i konfiguruje dostępne kanały oraz ich kolejność dla każdego kraju docelowego. Nadawcy i branding pokazuje, co dociera na każdym kanale.
Dotrzyj do użytkownika oboma kanałami
Nie musisz wybierać jednego kanału. Podaj zarówno email, jak i phone_number w to, a Bird ustali plan dostarczenia na podstawie Twojej konfiguracji krajów, która pokazuje dostępne kanały i ich kolejność dla każdego kraju docelowego. Bird realizuje ten plan, aż wysyłka zostanie zaakceptowana. Jeśli dostarczenie później całkowicie się nie powiedzie, Bird wyśle nowy kod przez następny kanał. Sprawdź kod z tym samym obiektem to, którego użyto do utworzenia weryfikacji. Klient wpisuje ten kod, który do niego dotarł.
Następne kroki
- Wysyłanie weryfikacji: opcje, statusy, ponowne wysyłki, ustawienia i limity w szczegółach.
- Konfiguracja krajów: włączanie krajów i ustawianie kolejności kanałów dla każdego kraju.
- Nadawcy i branding: jak wyglądają wiadomości z kodem i jak wysyłać e-maile z własnej domeny.
- Dokumentacja API Verify: pełny schemat żądań i odpowiedzi.
- Weryfikacja numerów telefonu przy rejestracji: film pokazujący integrację tego samego przepływu w sklepie internetowym
Powiązane zasoby
Przejdź do dokumentacji, przewodników i przykładów dotyczących tego tematu.