Get Started
Create an Email template
Creating a professional email template in Bird involves several steps, from accessing the email templates section to publishing your final design. This guide provides a detailed, step-by-step approach to help you through the process.
Business in a box.
Discover our solutions.
Log in to the app
Step 1: Access the Email Templates Section
Log In to Your Bird Account: Enter your credentials to access your dashboard.
Navigate to Email Templates:
From the dashboard, go to Marketing > Manage > Content > Email Templates.
Here, you'll find the template library with pre-built email templates.
To view templates you've created, click on the Saved Templates tab.
Step 2: Create a New Email Template
Choose Your Starting Point:
Import a Template: Click Import Template to paste your custom HTML code.
Build from Scratch: Select Create Blank Template to design a new template from the ground up.
Set Up Template Details:
Name Your Template: Provide a unique and descriptive name.
Select Default Locale: Choose the primary language for your template.
Click Create Template to proceed to the email editor.Bird CRM docs | Bird Docs
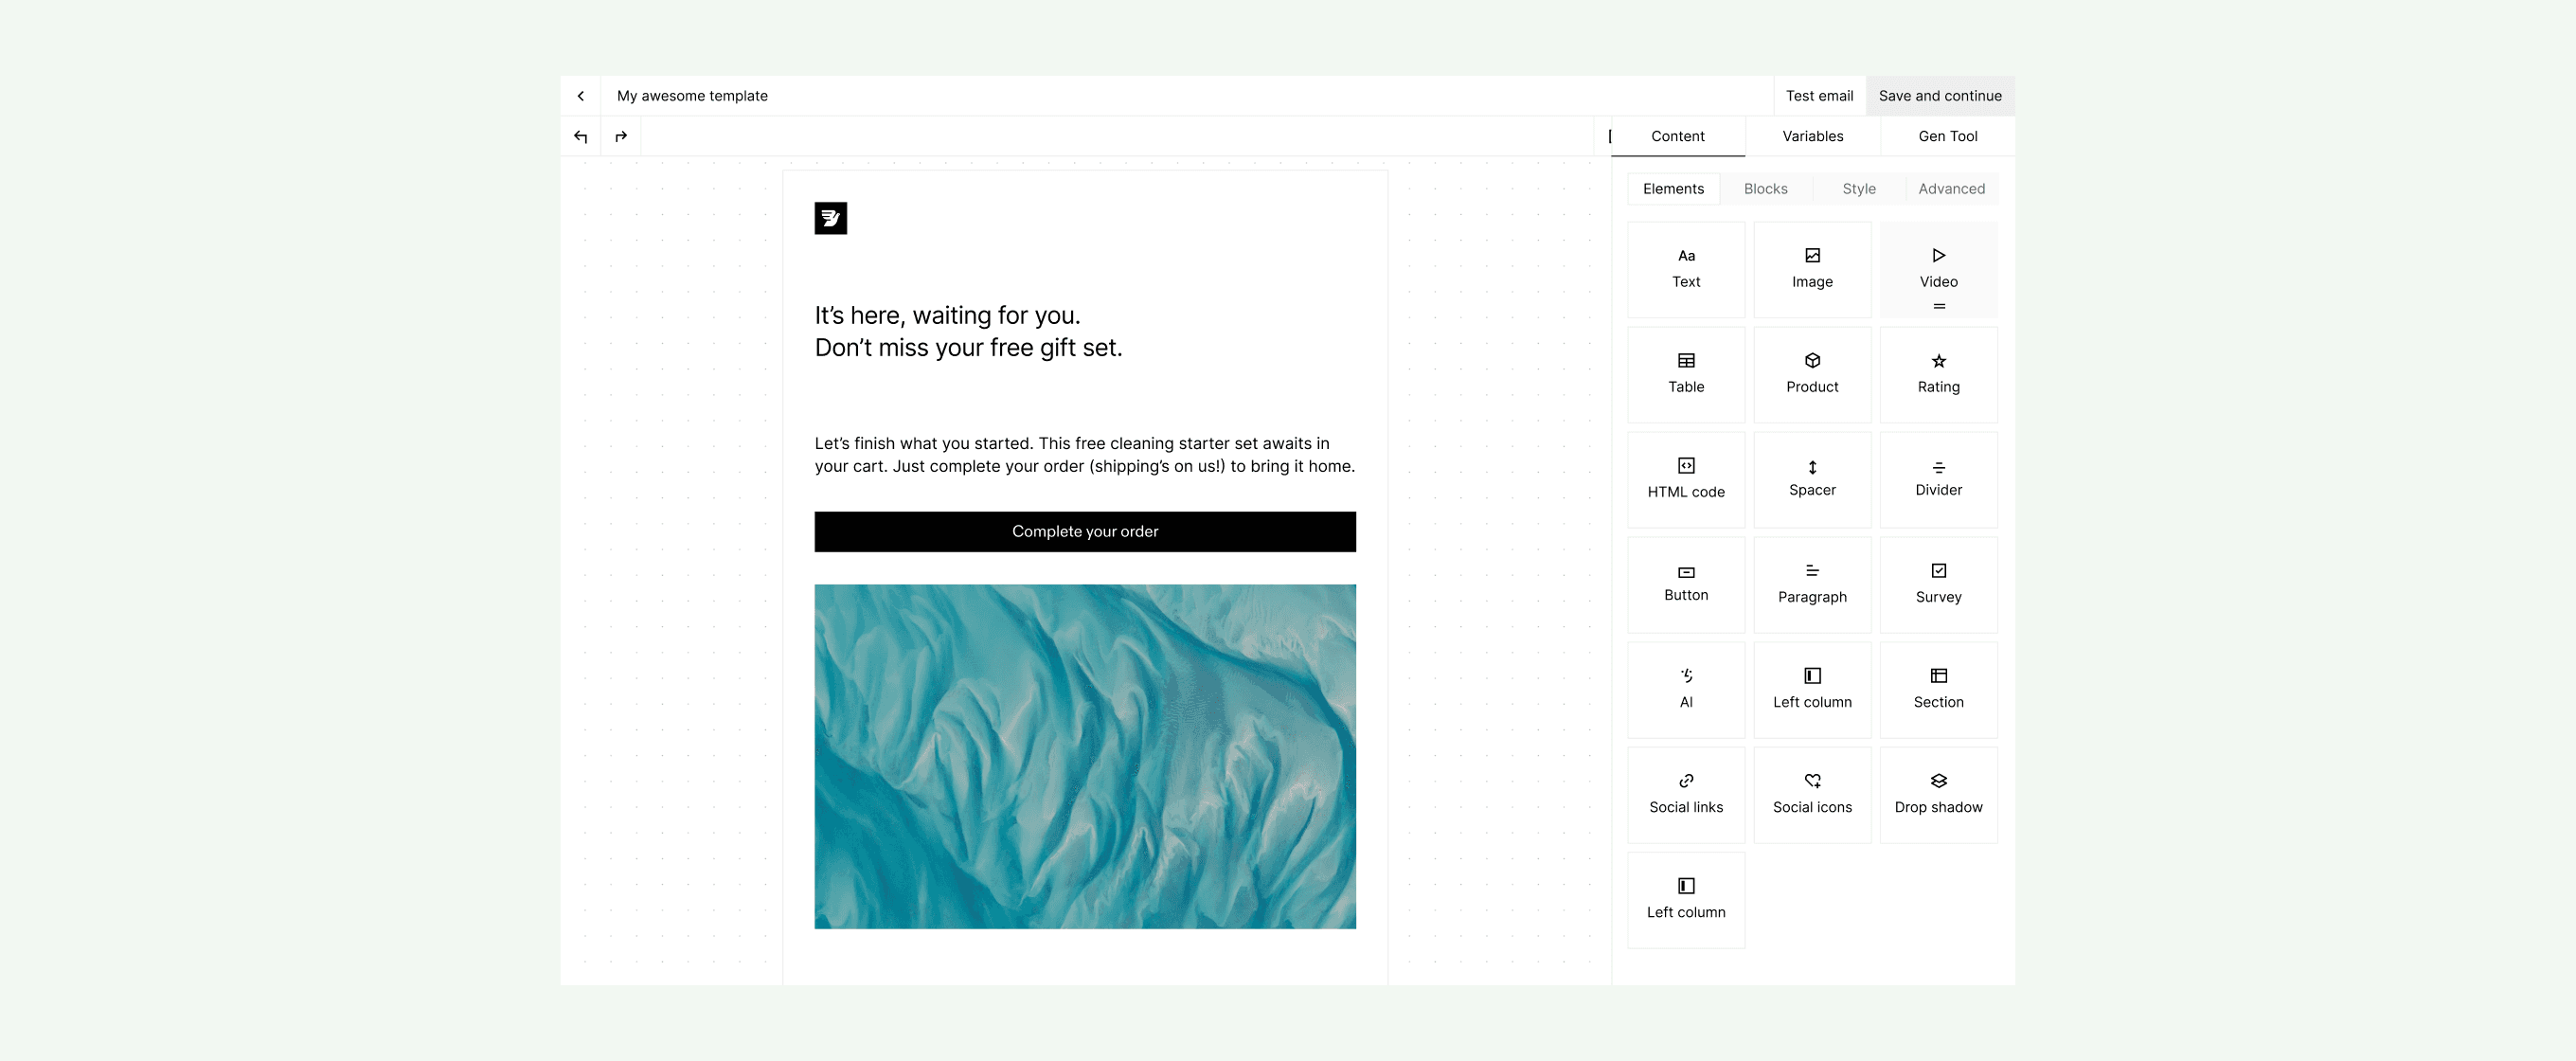
Step 3: Design Your Email Using the Drag-and-Drop Editor
The email editor offers a user-friendly drag-and-drop interface with various content blocks:
a. Add Content Blocks:
Text Blocks: Drag a text block into your template to add and format text.
Image Blocks: Use image blocks to insert pictures. Upload images from your computer or via URL, and set alt text for accessibility.
Button Blocks: Include call-to-action buttons by dragging a button block into your template. Customize the text, link, and appearance.
Social Icons Blocks: Add social media links by dragging the social icons block into your template. Configure the icons to link to your social media profiles.
b. Customize Blocks:
Text Formatting: Highlight text to apply formatting options like bold, italics, or links.
Image Settings: Adjust image dimensions, alignment, and padding as needed.
Button Styling: Modify button color, shape, and text to match your branding.
c. Save Reusable Blocks:
To reuse a block in future templates, click the star icon next to the block.
Provide a recognizable name and click Add to Favourites.
Access saved blocks in the Saved Blocks section for future use.
Step 4: Apply Styling and Branding
Set Global Styles:
In the Styles tab, define overall settings such as background color, email width, and default font styles.
Configure text and link colors, as well as letter and line spacing.
Add Custom Fonts:
Choose a Google Font from the dropdown list and set a fallback font.
Alternatively, add a custom font by providing the necessary details and specifying a fallback font.
Customize Buttons:
In the Styles tab, adjust button colors, shapes, and styles to align with your brand.
Step 5: Incorporate Advanced Features
Add Custom Variables:
In the Variables tab, create placeholders for dynamic content (e.g., recipient's first name).
Click Add Variable, name it appropriately, and save.
Use AI Content Generation
Utilize the AI generation tool by entering a prompt and clicking Reply to receive generated copy.
Step 6: Preview and Test Your Email
Preview Your Design:
Use the preview feature to see how your email will appear on desktop and mobile devices.
Ensure all elements are correctly aligned and formatted.
Send a Test Email:
Click Send Test Email to send a preview to yourself or a colleague.
Verify that all links, images, and dynamic content display as intended.
Step 7: Finalize and Publish Your Template
Save Your Work:
Click Save to ensure all changes are stored.
Publish the Template:
Once satisfied with the design and content, click Publish.
Your template is now ready for use in campaigns and journeys.
By following these steps, you can create a customized and professional email template in Bird that aligns with your brand and effectively engages your audience.