Import your contacts into bird
Video guide
Learn how to import and manage contacts in Bird. This guide covers importing CSV files, creating contact lists, managing subscription statuses, and adding individual contacts to existing lists.
Step by step guide
Importing contacts into Bird allows you to efficiently manage your audience by uploading contact information in bulk. This guide provides a step-by-step process to import contacts using a CSV file.
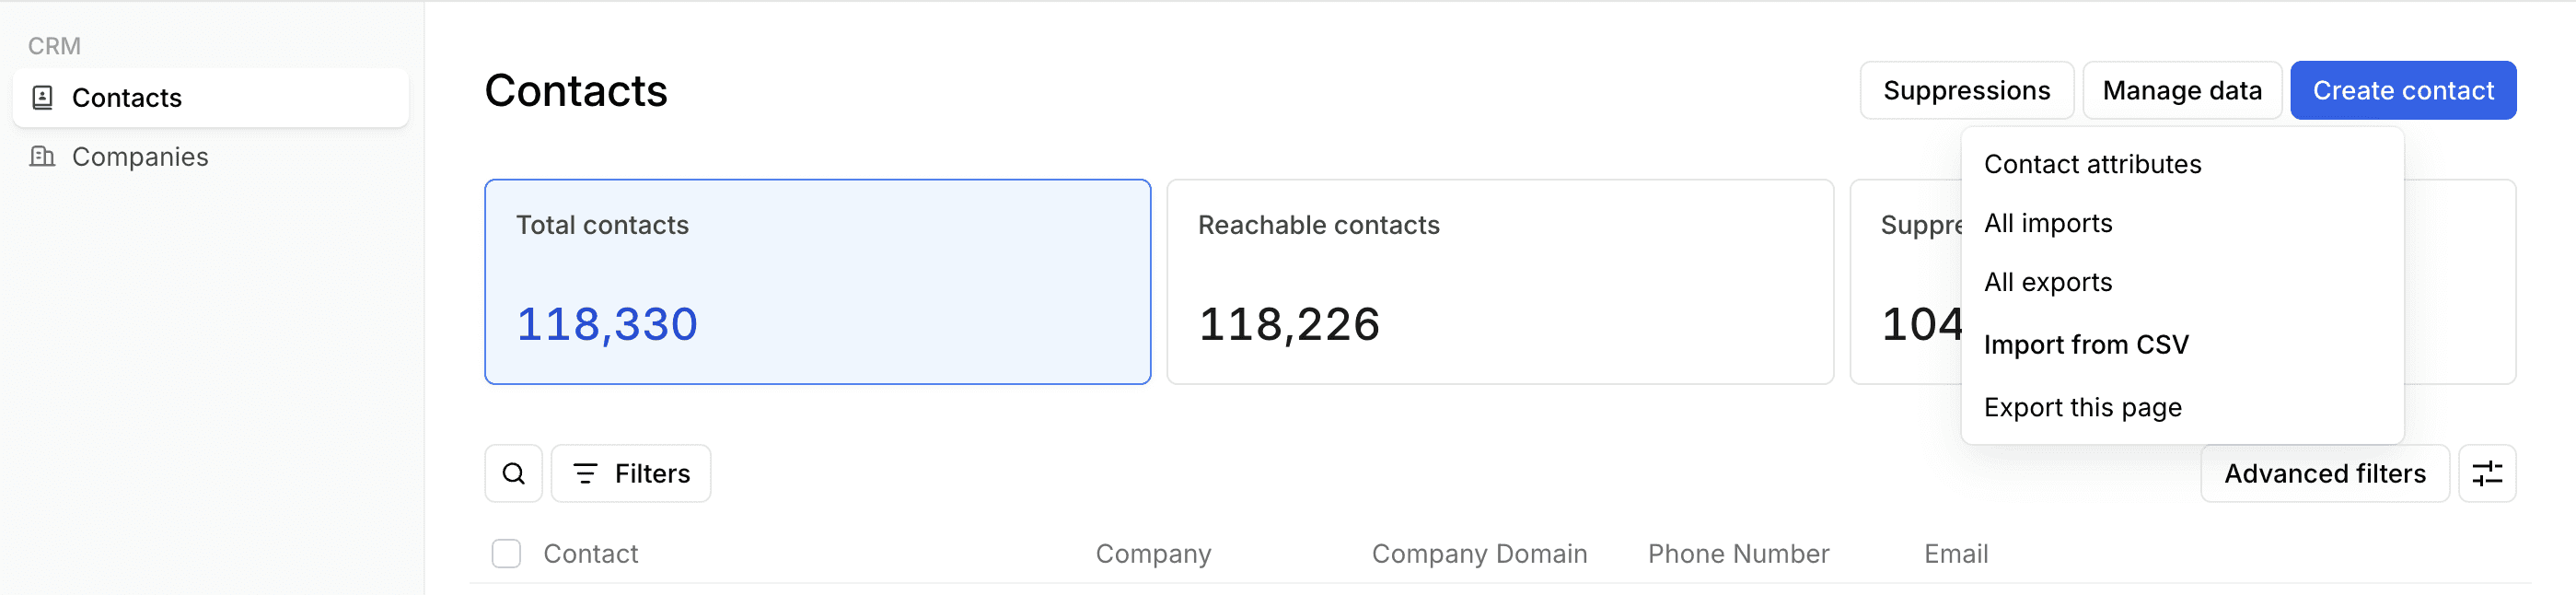
Access the Contacts page
- Go to Marketing > Audience > Contacts
- You can also go to CRM > Contacts
- Click on Manage data > Import from CSV
Prepare your CSV File
- Download the model file: In the CSV importer, download the provided model file to use as a template for proper formatting.

- Ensure correct structure: Your CSV file must include at least one identifier for each contact, such as a phone number or email address. You can also include additional attributes like country, first name, last name etc.
If you format your CSV file like the one below, you will be able to successfully complete your import.
Note that not all fields are completed, but each contact has data in either the phone or email columns.
| firstName | lastName | country | phone | |
|---|---|---|---|---|
| Jane | Smith | US | +911234567892 | jane-smith@sample.com |
| Daan | Bakker | DE | daan-bakker@sample.com | |
| Maria | UK | +911234567891 | ||
| fatima-khan@sample.com |
Duplication and Merging:
Note that any duplicate rows will be ignored and no duplicate contacts will be created. Also, note that since both phone and email are considered as identifiers, if two rows have same email and different phone numbers, they will be merged into one contact. Same applies for two rows with same phone and different emails.
Adding attribute columns
You can also add values for any attributes in the csv upload by referencing to their name in the csv header. For example to add values for City attribute in your csv upload, add the highlighted section in the Name field (not display name) of the attribute after attribute. i.e attributes.city to the csv header.
You can find these names under Contacts > Data Management > Attributes
Note that the column name should be city in this case and NOT the display name City.

Below would be the csv format:
| phone | country | city | birthday | |
|---|---|---|---|---|
| jane-smith@sample.com | +911234567891 | US | New York | 2025-07-25T12:00:00Z |
The format for uploading the date type attribute is YYYY-MM-DDTHH:MM:SSZ
Custom Identifiers
When uploading custom identifiers and communication attributes, you may not need email or phone as mandatory columns but custom identifier column will be mandatory. If your custom identifier attribute name is attributes.userId (not display name), then the column you should use should be identifier.userId.
For communication attributes for phone or email, you will need to use their name like any other attribute name columns. If your communication attribute is attributes.phone_number and attributes.email_address then the csv import will look like below
| identifier.userId | phone_number | email_address | country | city |
|---|---|---|---|---|
| 1234 | +911234567891 | a@b.com | US | New York |
Upload your CSV file
Drag and drop your prepared CSV file into the designated area, or click Browse to select the file from your device.
After uploading, review the fields to ensure all data has been correctly mapped.
- Scroll through the columns to verify accuracy.
- Once satisfied, click Continue.

Map Columns
Under Map Columns section, you will see a mapping where you have your CSV file columns on left side mapped to Contact attributes to the right side.
- Some of the mapping will be pre-filled for you, you could update it as needed. After updating, click on Save mapping.
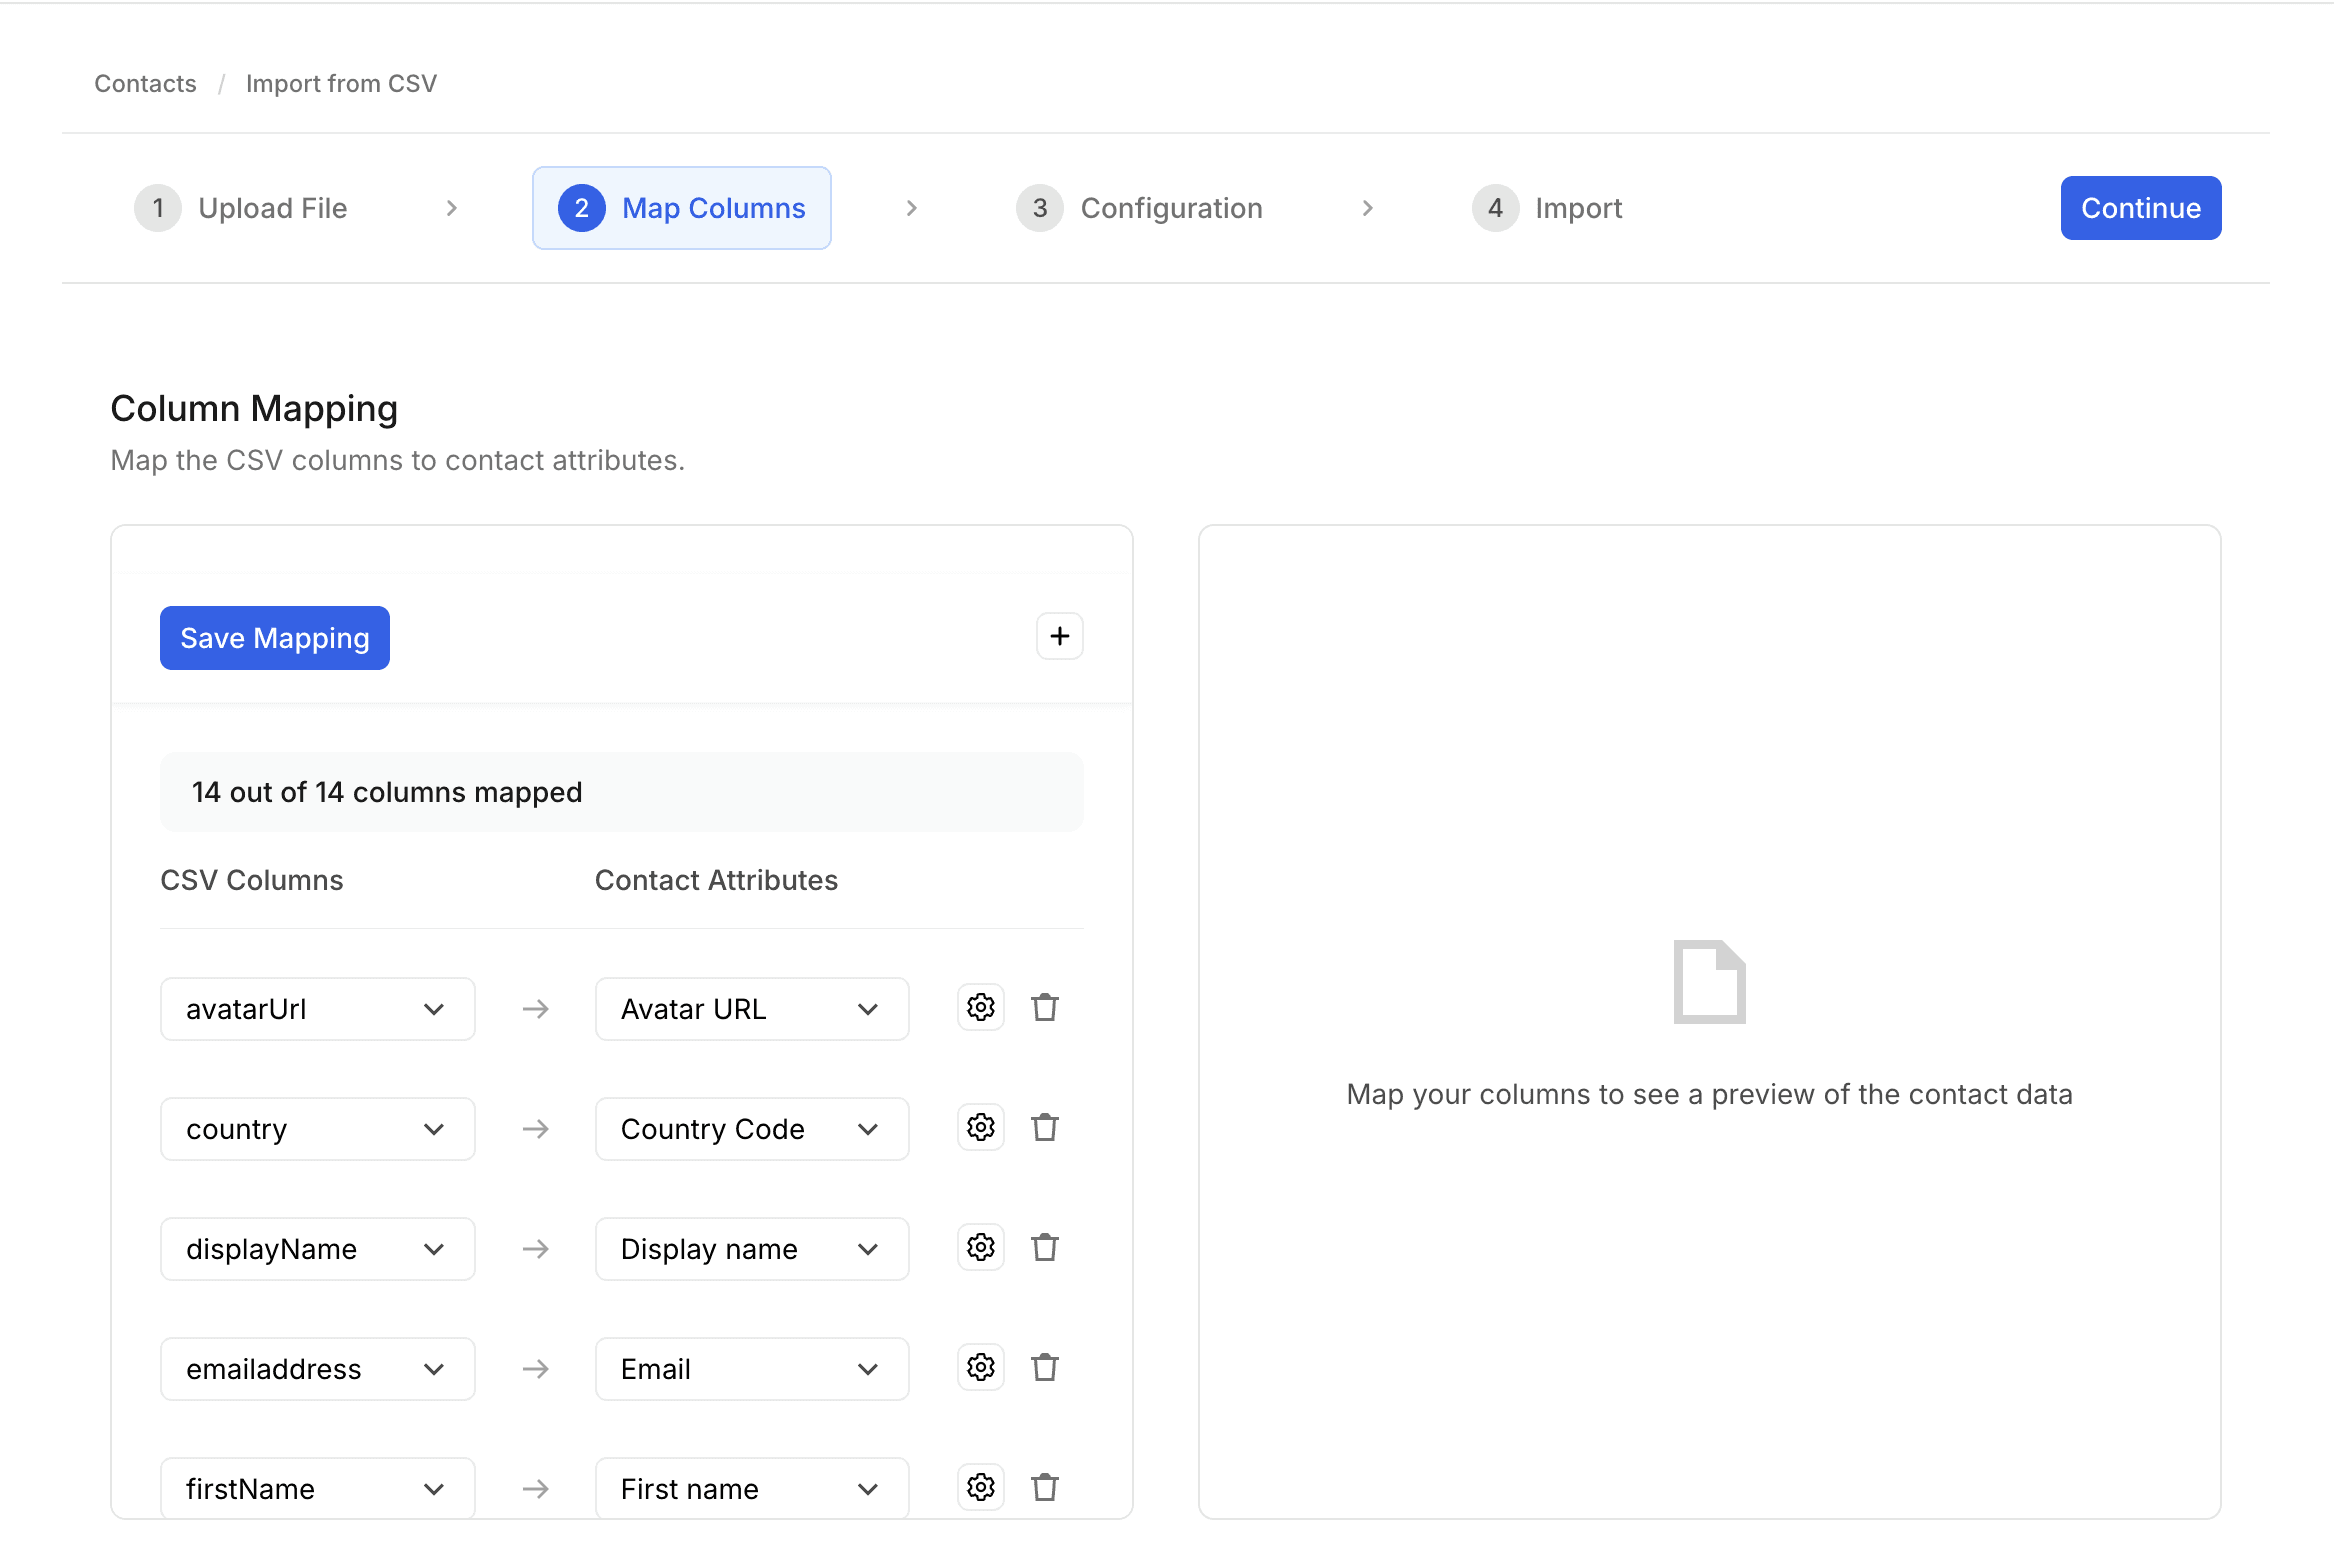
-
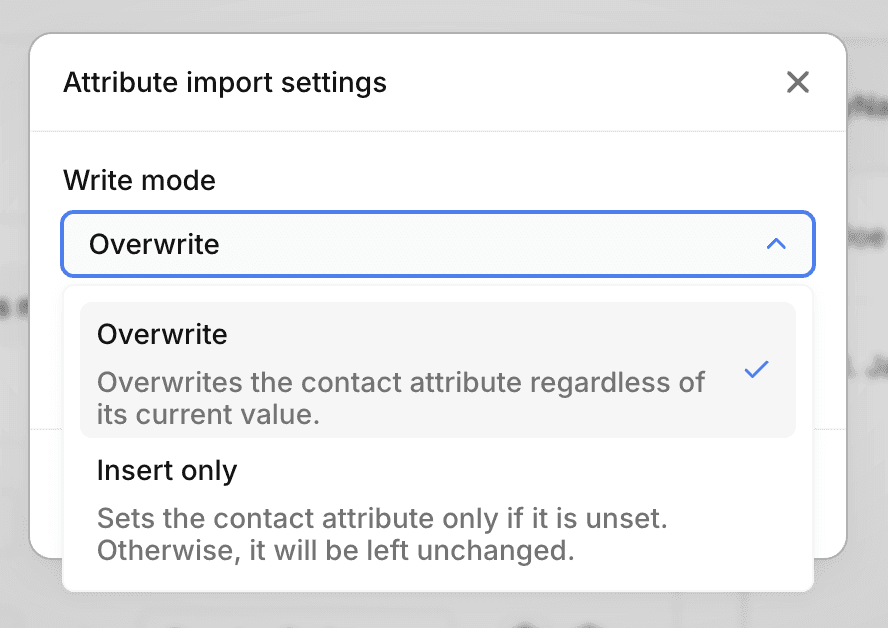
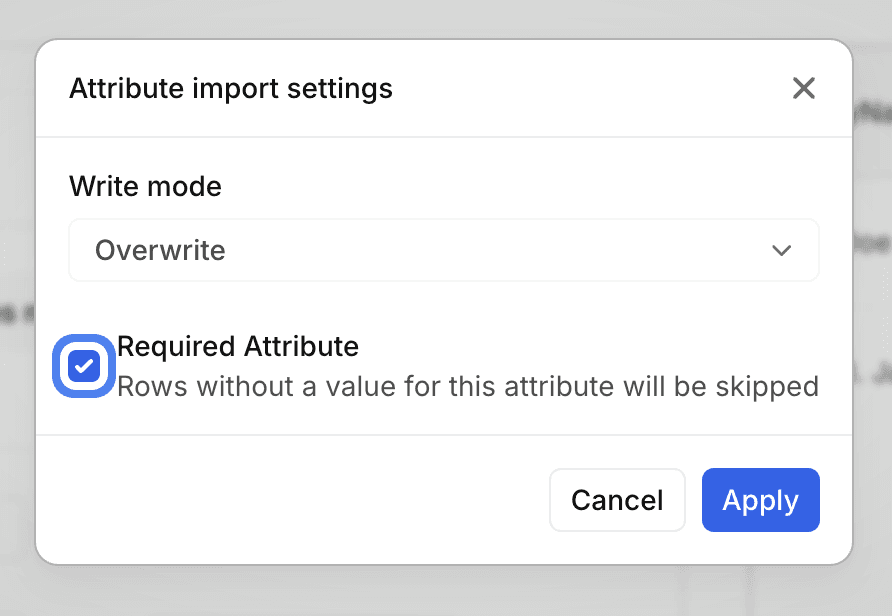
You can click on gear icon next to any mapping to see advanced settings for the contact attribute such as
- If you want to override the existing value or only set it if it is blank. By default, the import is set to override.
- If you want the value to be required, which means the contact row will not get imported if the value if missing for a required attribute. By default, attributes are not required.
Provide further configuration
Under Configuration step, you can define additional settings such as Subscription, identifiers, lists as well as enabling automations.
- Identifier mapping: You can configure and select any identifiers you want to define and map it with the csv file column headers. You can also create new custom identifiers by typing in and selecting from the dropdown.

- Adding to Lists: You can select one or more existing lists to add the contacts to. You can also create a new list and add to it.
- Enable automations: You can configure if you want the automations like journeys and flows to be triggered automatically based on your import when contacts are created or updated. By default, the automations will trigger if they are based on contact creation or updates

- Subscription Management: You can define for each platform how you want to set the Subscription attribute values of contacts getting imported. Please note that only Subscribed contacts will show up as estimated recipients in Campaigns.

Review and Import
Review all settings and mappings.
- Click Continue to Import section
- You can click on Run Audit to check your data for any errors before importing
- If everything is good, click on Import

You will be redirected to the Imports tab, where you can monitor the progress and view details of all imports

Common Questions during Import
Why my list has less number of contacts than what was imported
The import view shows the number of all processed rows from your CSV file, however, if your file has duplicate identifiers such as phone or email, the total number of contacts created and added to your list will be less than expected.
Note that if you have common identifiers then your contact will be created as one and other identifiers will be added to it. For example, if you have 2 contacts with different email but same phone number, you will get only one contact created with 2 emails and 1 phone number.